Instance Resize
Instance Resize
The Sunlight.io platform provides the capability of changing the size of an instance by changing its flavor. This process rebuilds the instance and concludes with a restart.

Note
By default, the Sunlight.io "server resize" provides the guest operating system with the chance of performing a controlled shutdown, before the instance is powered off and the instance is resized.
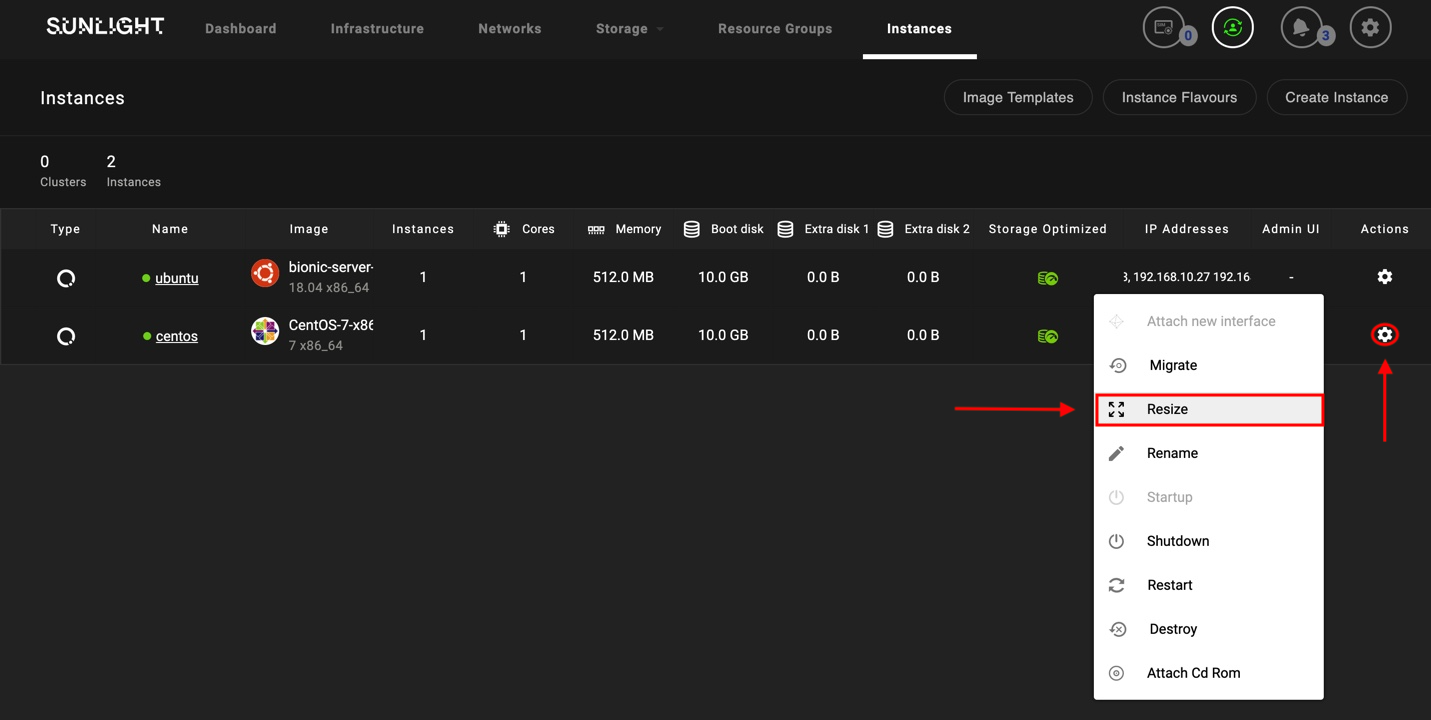
To resize an instance, visit the 'Instances' tab and follow the next steps.
- On the corresponding VM go to Actions button -> Resize
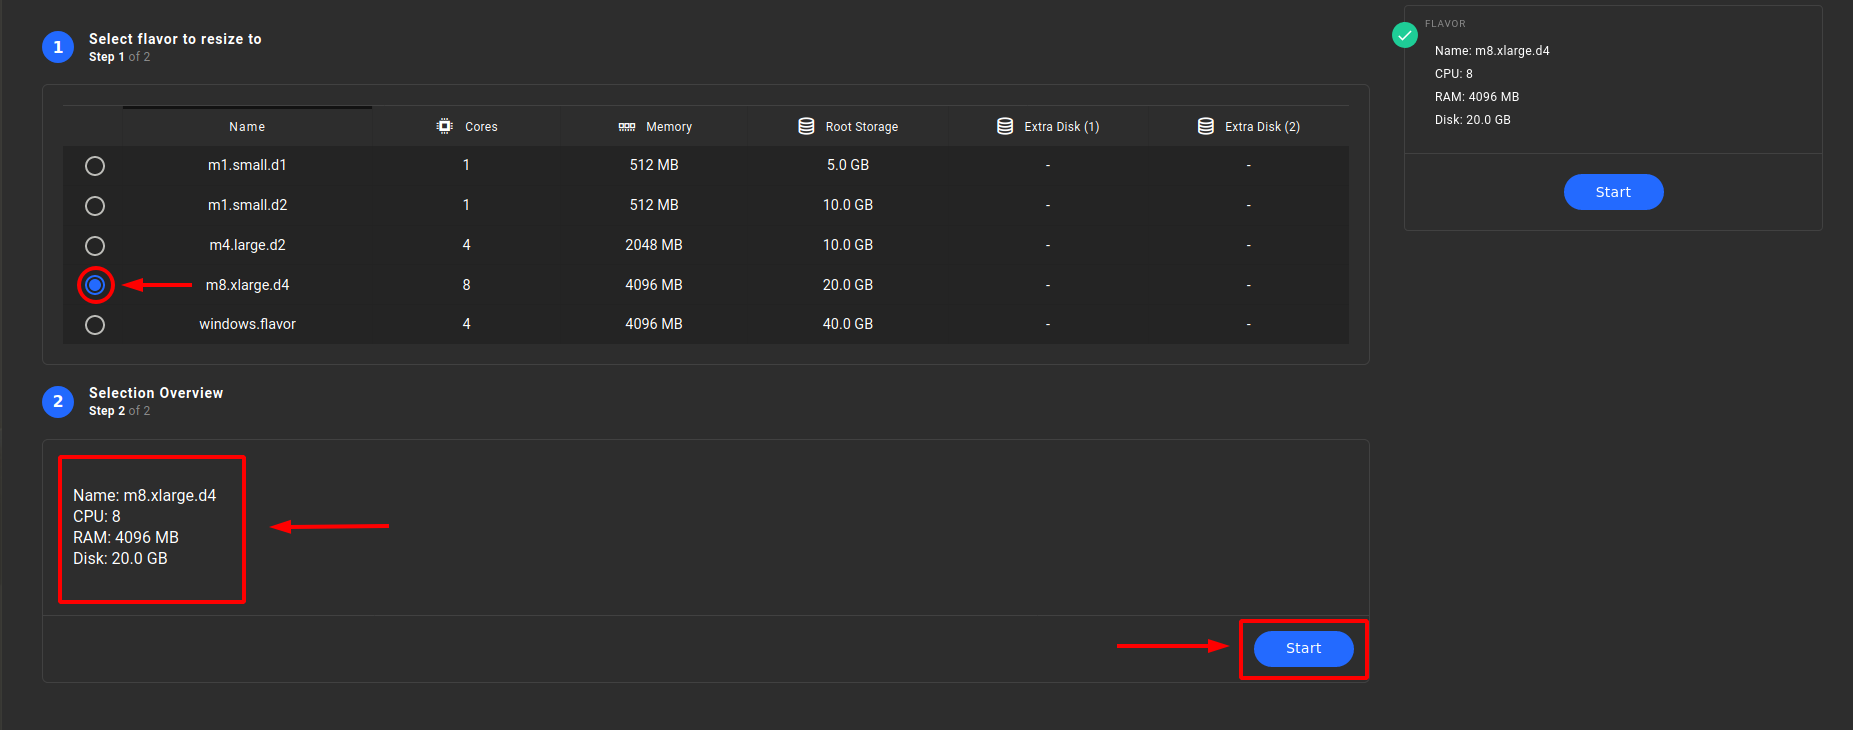
A new screen appears, providing the option of choosing from one of the supported flavors, according to the available resources, in order to resize the instance. As soon as the user selects a new flavor, for example the m8.xlarge.d4 flavor with 4 extra cores, 2 extra GB of memory and 20GB of extra storage (on top of the existing one), an overview of the selected flavor's specifications is displayed, as shown in the figure below.
Warning
The user has the ability to choose a flavor for increasing or decreasing the number of cores and memory size, as well as to increase the size of the available root partition and the extra disk of this instance. If you want to increase the capacity of the root and the capacity of extra disks or add extra disks to an instance, these actions should be performed separately (one at a time).
- Press Start to initiate the resize process.
- The user is then requested to confirm the resize action. Press OK to proceed. Resizing can take some time. During this time, the status of the instance displays 'Resizing'.

Following the successful completion of the resize process, the new resized instance with the new flavor specifications are displayed, as illustrated by the following figure.

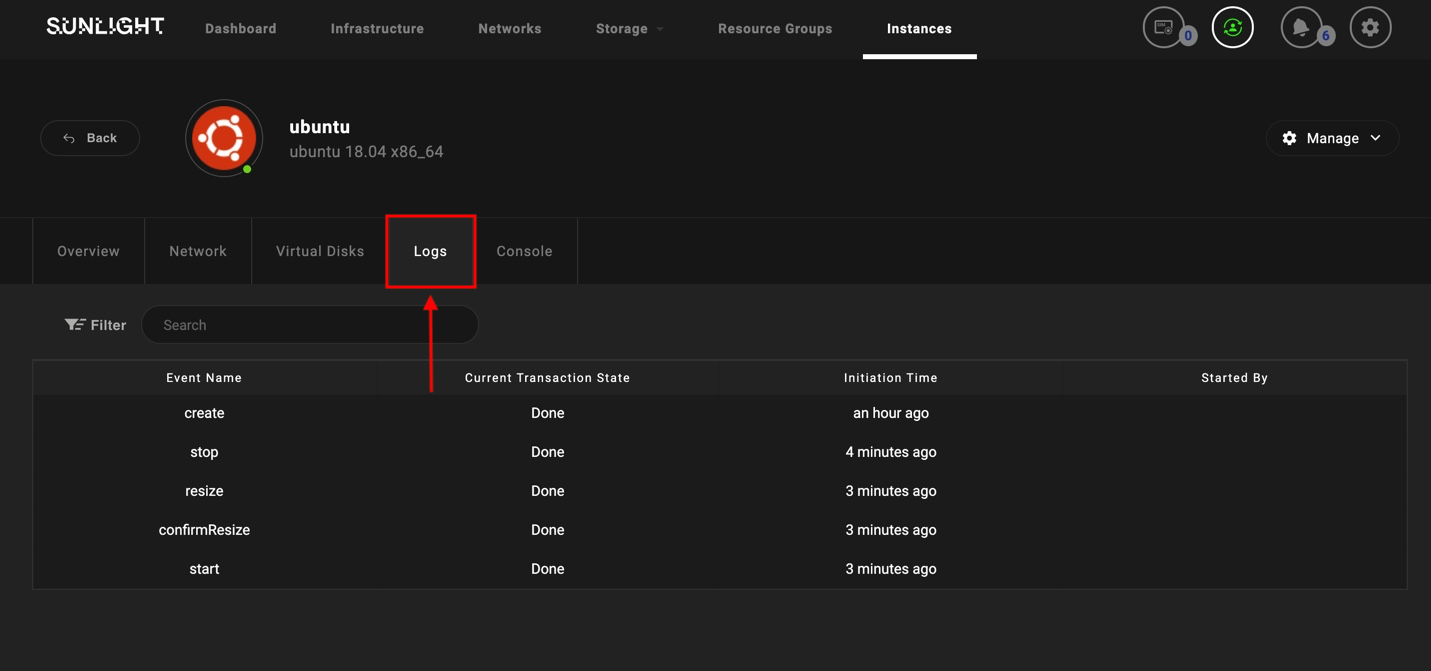
Now, the user is also able to open the logs of the resized instance and check the step by step actions that were performed, until the resize process was completed.
Use case: Adding a new extra disk storage
As an example, we consider that the user has created an ubuntu VM based on the flavour m4.large.d2, with the following specifications :
- Cores : 4
- Memory : 2048 MB
- Root Storage : 10 GB

In case the user would like to add a new extra disk storage of 20GB on the current VM, the following procedure should be followed:
Create a new flavor with the preferable extra disk storage (20GB)
- Select the "Instance Flavors' tab at the top right of the Instance page, as depicted below:

- Click on the 'Create Flavor' button, in order to create a new flavour with the desired specifications.

- Type the name of the new flavor, specify the size of the extra disk storage in GBytes and click on the 'Create' button in order to proceed. Fill in the rest of the resources’ fields with the current corresponding Instance's specifications values.
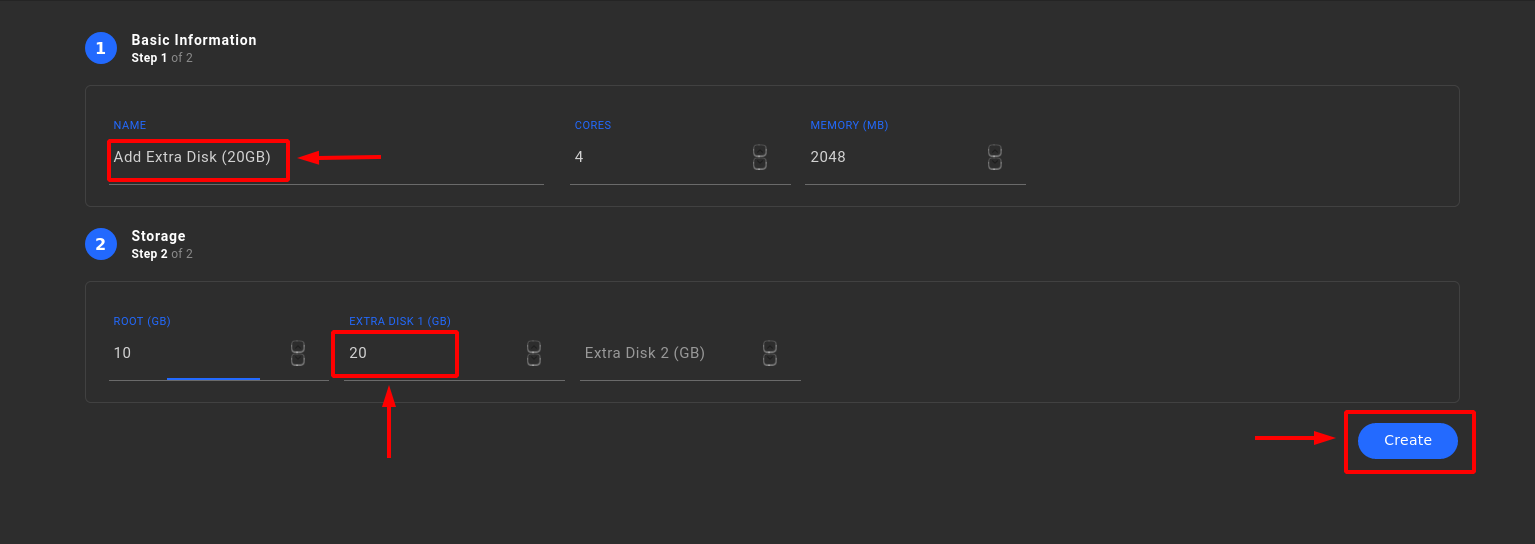
As it can be observed, a new flavor called 'Add Extra Disk (20GB)” has been added in the flavors list.

- Now navigate back to the Instances page, click on the configuration option of the specific Instance and select the 'Resize' tab option, as illustrated in the following image.
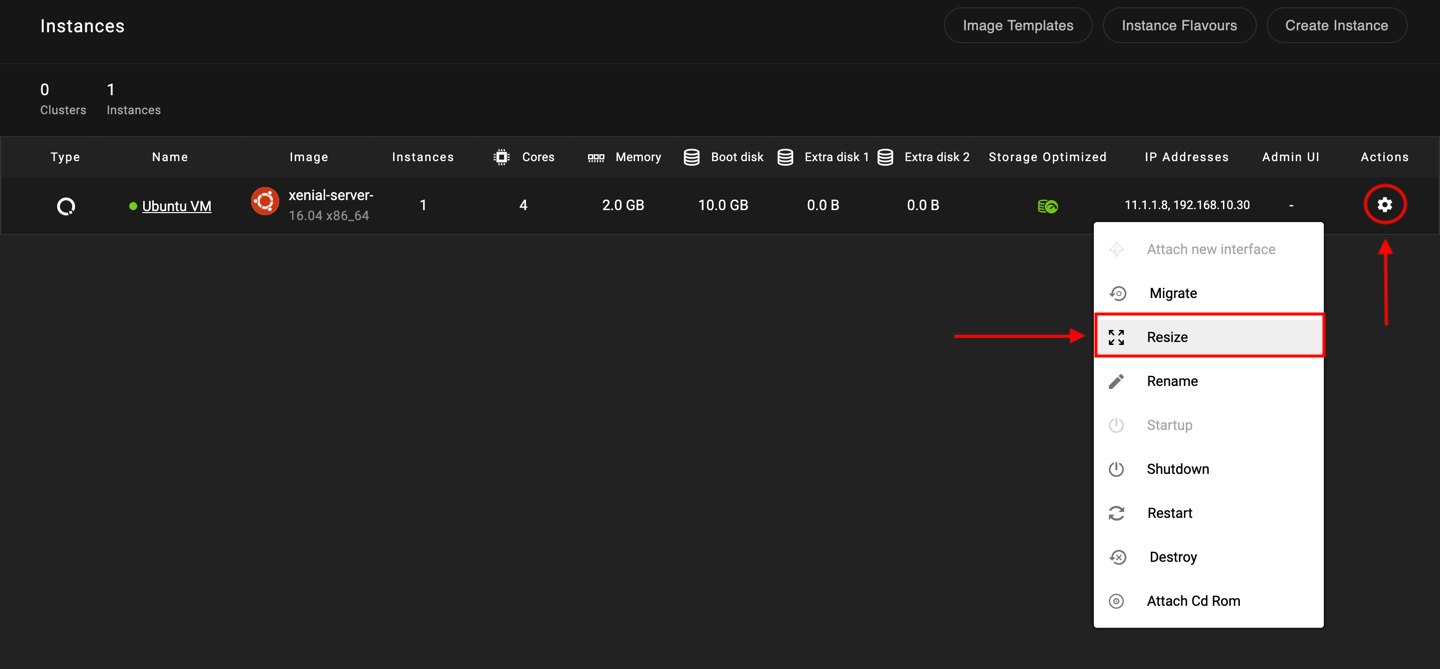
The browser will redirect you in a new page, in order to select a flavor for the resizing Instance. Your already created flavor 'Add Extra Disk (20GB)' will appear in the list of available flavors, as long as the mentioned limitations are satisfied.
- Select the 'Add Extra Disk (20GB)' flavor, choose the datastore for the extra disk storage and click on the 'Start' button, in order to proceed to this resizing.

- Select 'OK' in order to confirm the resizing action, or select 'Cancel' to abandon this process.

Now as you can notice the Instance has been resized successfully with an extra disk of 20GB, as depicted in the following image :
