VLANs (virtual LANs) Configuration
A virtual LAN (Local Area Network) is a logical subnetwork that can group together a collection of VM instances and offers data connectivity between each other. Specifically, VLANs support is intended to group together VM instances which run on the same or separate nodes and communicate with each other most frequently, providing overall performance, scalability and security network benefits.However,this configuration demands the network interfaces that are attached to these VMs to be tagged with the same VLAN TAG. In the following sections, two (2) different VLAN configurations are described, that are supported by Sunlight platform. The first one refers to the typical VLAN service and the second to the wired VLAN service.
Setting up a typical VLAN
Each VLAN provides data link access between VMs connected to a network interface configured with the same VLAN TAG.
At a higher level, network administrators can set up new VLAN in a virtual network interface, through the Network Configuration section:
-
Click on "create network"
-
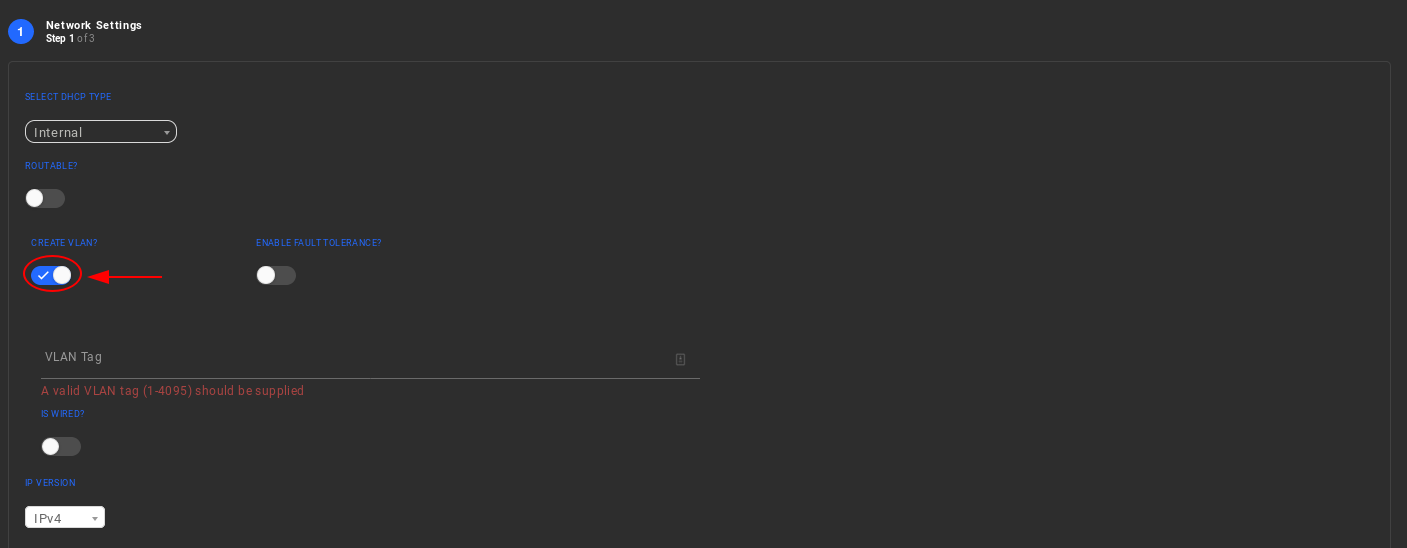
Choose the DHCP type of this network.
The options (External/Internal DHCP type) use external and internal Gateway respectively.
-
Enable "CREATE VLAN".
-
Type a desired VLAN Tag.

Warning
Netids for VLAN networks have BIT [63] configured. BITs [11:0] of VLAN netids hold the VLAN Tag.VLAN Tag 0 is reserved. Note: valid VLAN Tags range from 1 to 4095.
Note
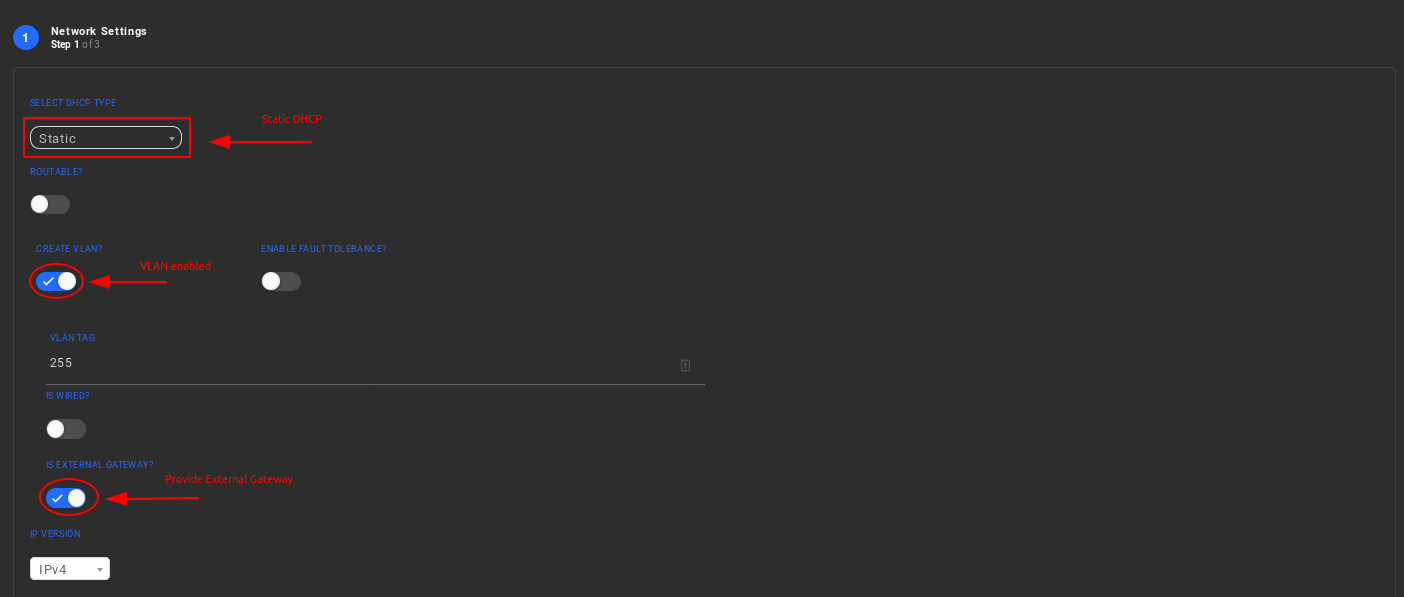
In case of "Static" DHCP type, the user should also enable the "IS EXTERNAL GATEWAY" in order to allow the traffic passing through other private networks or through the external world (Internet) as shown in the figure below.
-
Select one of the two available physical interfaces (NIC0 or NIC1), on which this VLAN configured virtual network interface will be attached.

Next steps for configuring this virtual network are exactly the same as the ones described in the network configuration section.
Setting up a wired VLAN
Wired VLAN configuration redirects tagged incoming data traffic into one specific VM which is "listening" for that particular traffic. In this case, wired VLAN support tags the traffic to a VLAN TAG and sends these data to a specific VM that matches this VLAN TAG, bypassing the entire NexVisor forwarding tables.Currently, in case the VLAN is wired, only one virtual interface (VIF) can exist for this network. In order to establish a virtual network interface configured as wired VLAN, network administrators should perform the following steps:
-
Select "create network"
-
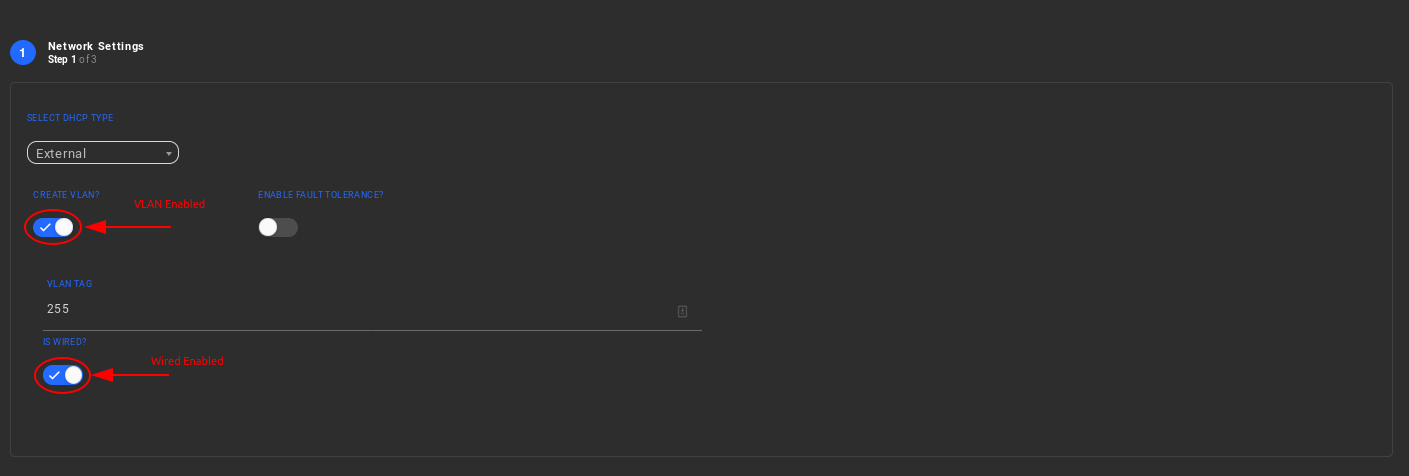
Choose a DHCP type (except for Internal). If the VLAN is wired, the DHCP needs to be configured as static or external.
-
Enable wired VLAN
-
Choose one of the two available physical interfaces (NIC0 or NIC1) in which the VLAN will be attached.
-
Steps 4 and 5 remain exactly the same as previous configuration.