Windows VM Configuration
The following steps describe the procedure required in order to properly configure and access Windows instances:
-
STEP 1 : Check the Network Configuration (DHCP TYPE)
Determine whether there is a DHCP server active on your network. The DHCP server is needed for configuring Windows instances manually. Please refer to Step 4 for further details.
-
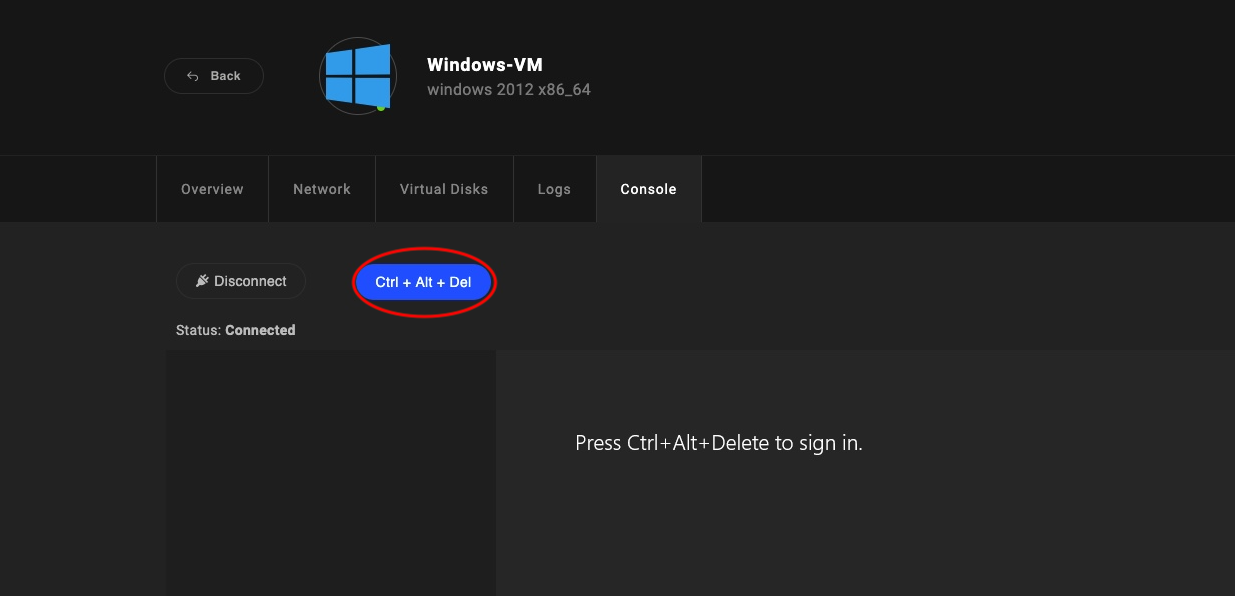
STEP 2 : Press CTRL-ALT-DEL to connect to the VM through the console.
Click on the windows created instance , select console and press Ctrl+Alt+Del to connect to the VM as shown in the following image.
-
STEP 3: Connect using the following credentials:
For Windows 2012 the following is enabled:
    Username: administrator
    Password: pass123
you SHOULD IMMEDIATELY change this to a secure password
For Windows 2016 the password for user administrator must be reset as soon as you connect via the VNC console.
Please follow the procedure:
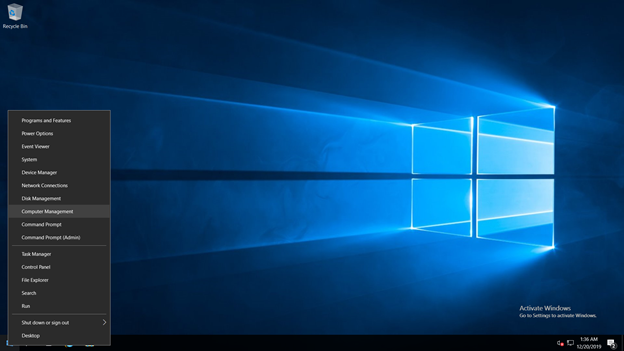
Right click on START button and click Computer Management
Navigate to Local Users and Groups , On Users choose the administrator account from right panel,
Press right click and choose set password

Press proceed

Set the new password to a secure password that you can remember and click ok
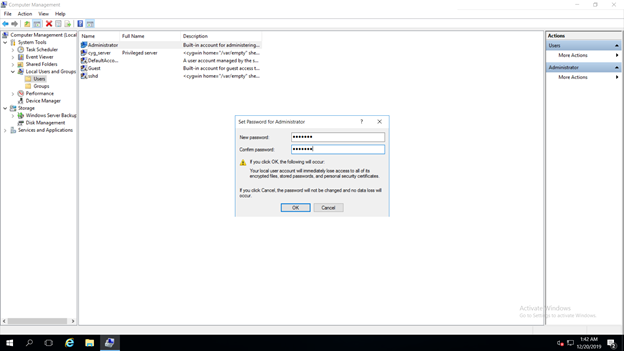
At this stage you have a secure password for the administrator user
-
STEP 4: Set IP for static network configuration:
In case the physical network interfaces - NIC0/NIC 1 have been configured as external and there is an active DHCP server connected to the Network, please ignore this step and proceed to step 5. If the physical interface is configured as static, some additional Windows Network configurations have to be performed manually, as described below:
- Select the Networks tab , check and note the Gateway IP address as it is highlighted in the next image
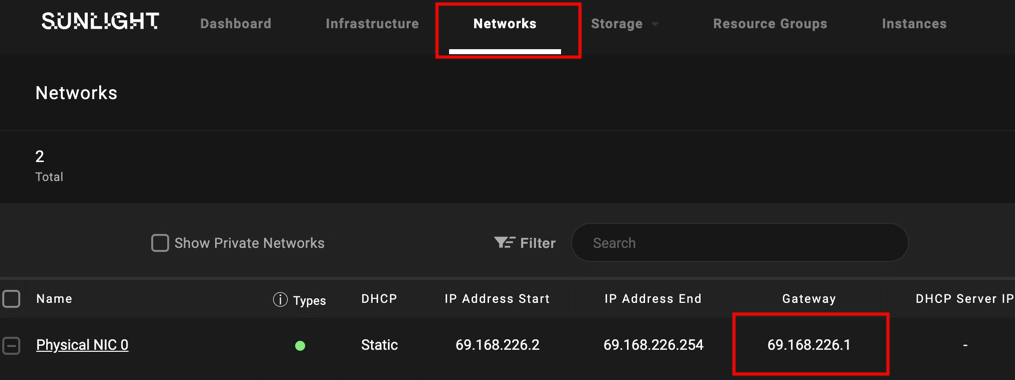
For instance in this case the Gateway IP address is : 69.168.226.1
- Select the Instances tab, check the windows instance that was created and note the displayed instance's IP address , as it is indicated on the following next image.
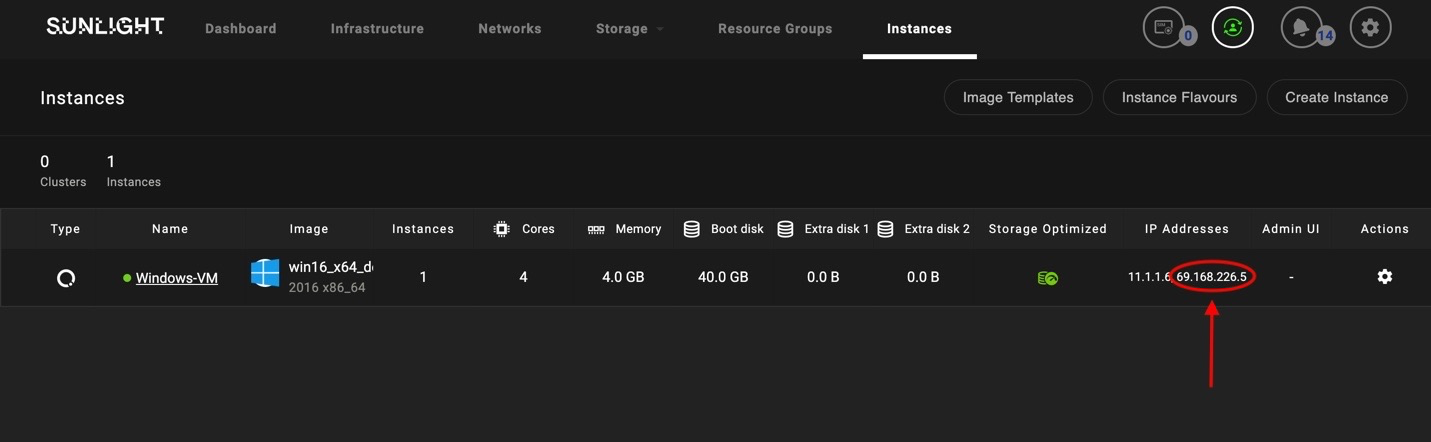
In this case the Instance IP is : 69.168.226.5
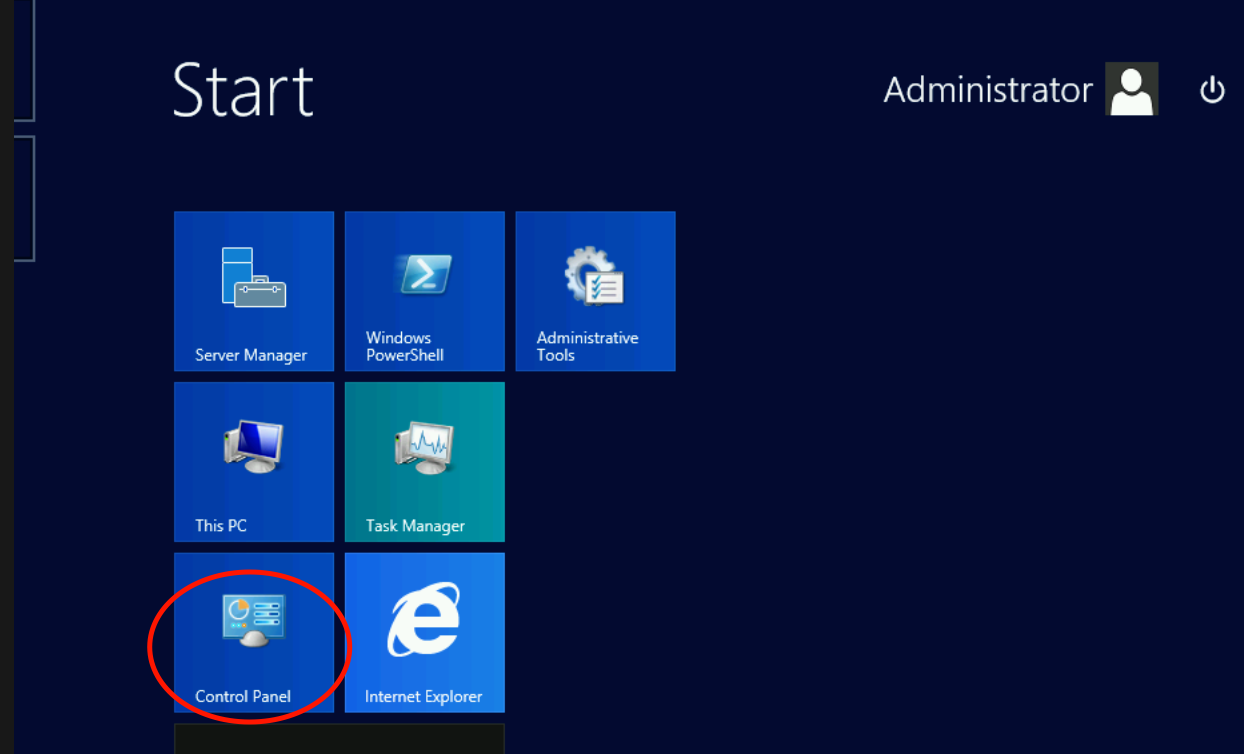
- While connected to the Windows VM, press the start button and navigate to the Control Panel
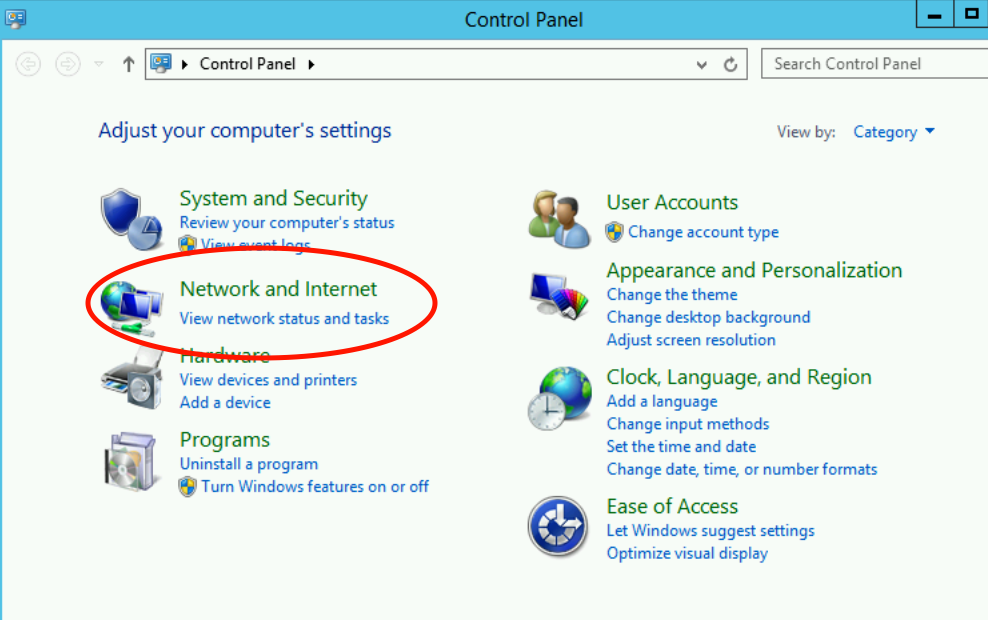
- Select Network and Internet Settings
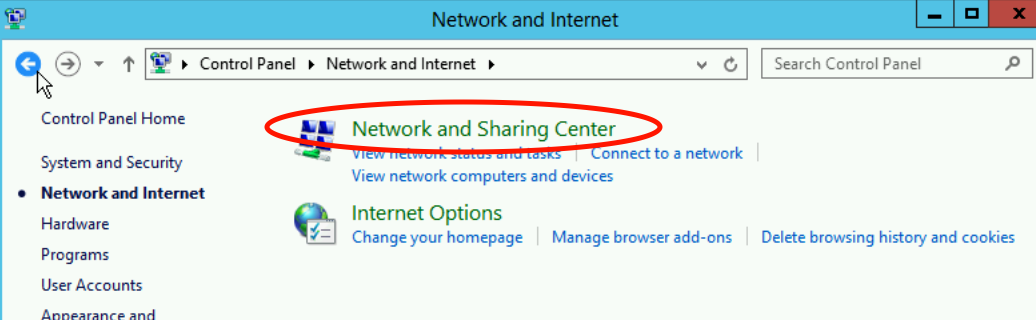
- Select Network and Sharing Center
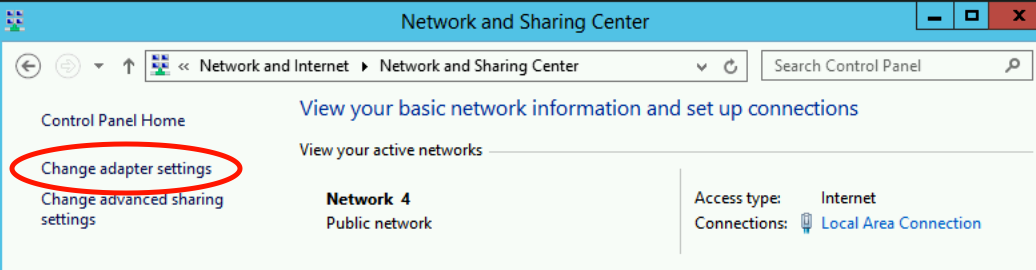
- Select Change adapter settings:
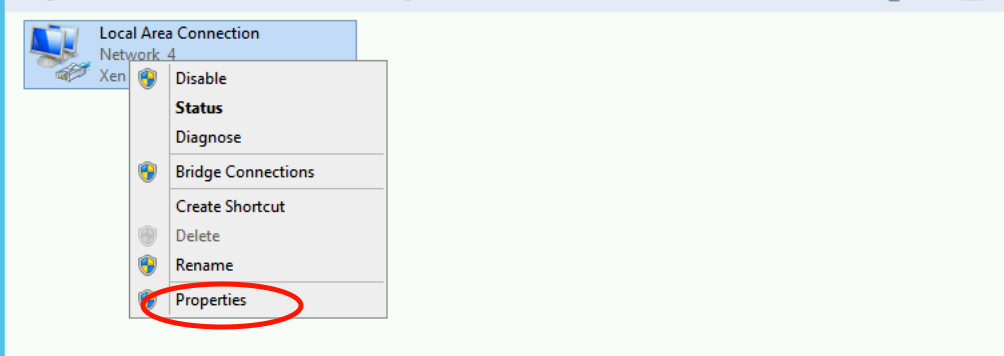
- Right click on "Local Area Connection" and select "Properties"
- Select “Internet Protocol Version 4”
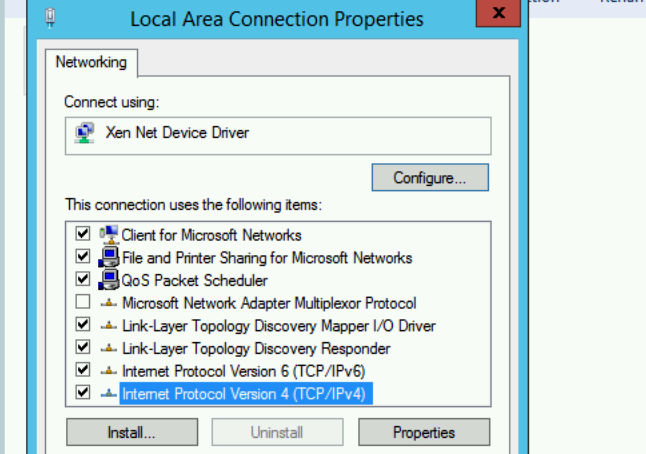
- Set the IP settings according to your network configuration based on the Gateway and Instance IP addresses, as noted in the previous steps. All of the other parameters have to be configured exactly the same as the ones presented in the following image:
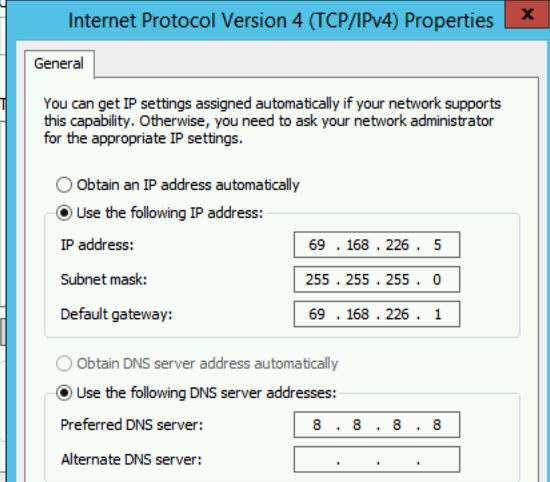
- -Click “OK” to save the settings.
-
STEP 5: Accept firewall rules
-
Select “start”, navigate to the search bar and write the following: “Windows Firewall with Advanced Security”.
-
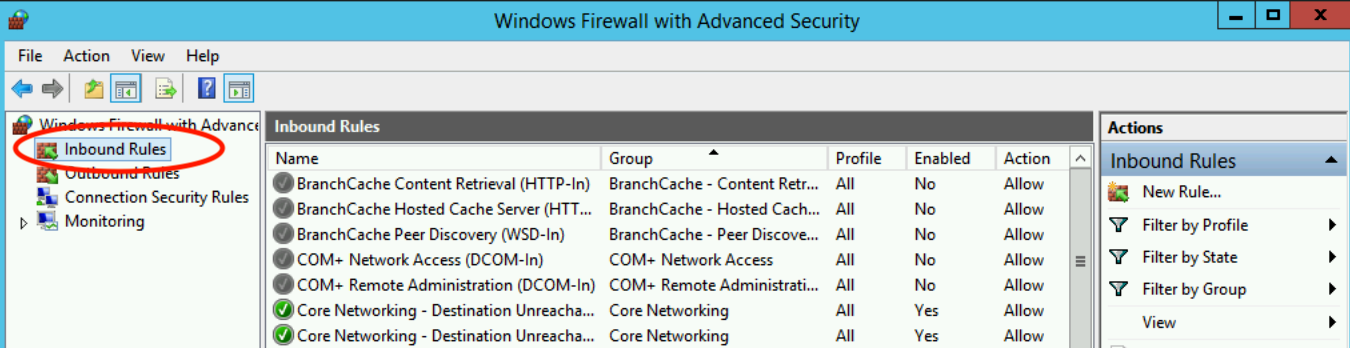
Select the inbound rules on the top left corner of the page, as illustrated in the image below
-Choose Public Profile and select “Enable Rule” on the following rules:
a)Remote Desktop - shadow (TCP-IN)
b)Remote Desktop - User mode (TCP-IN)
c)Remote Desktop - User Mode (UDP-IN)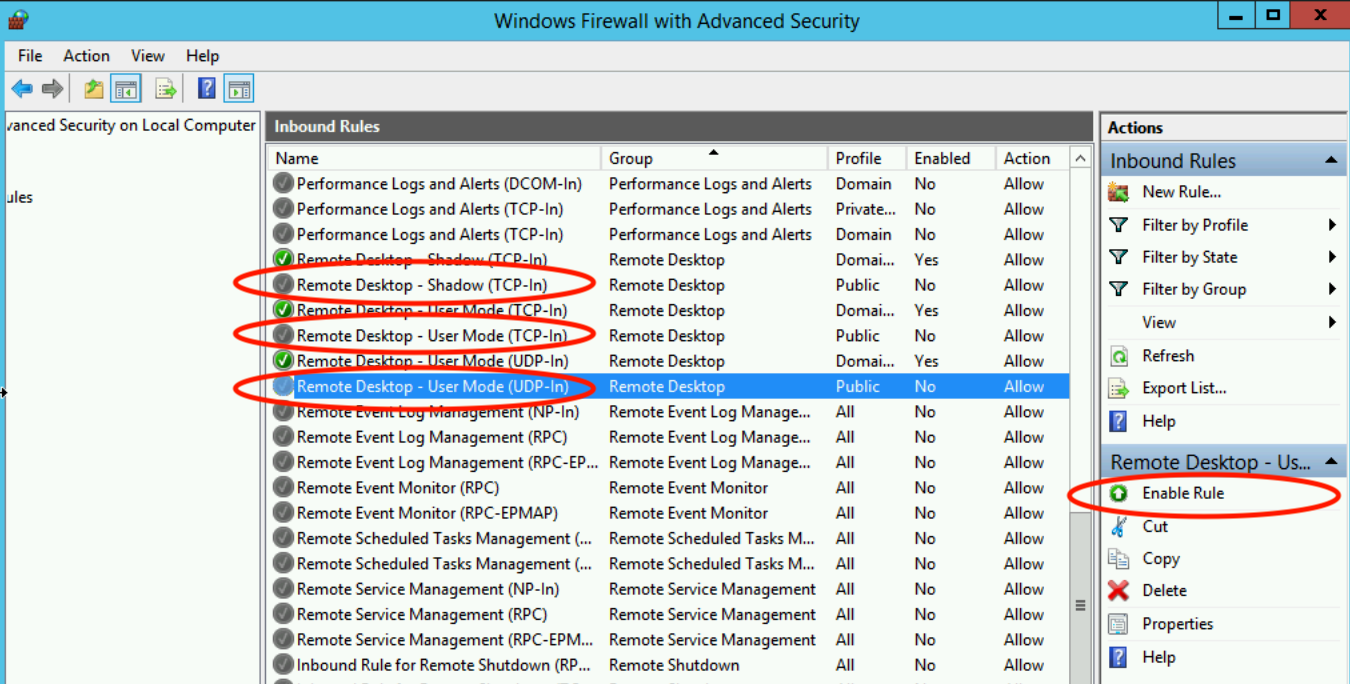
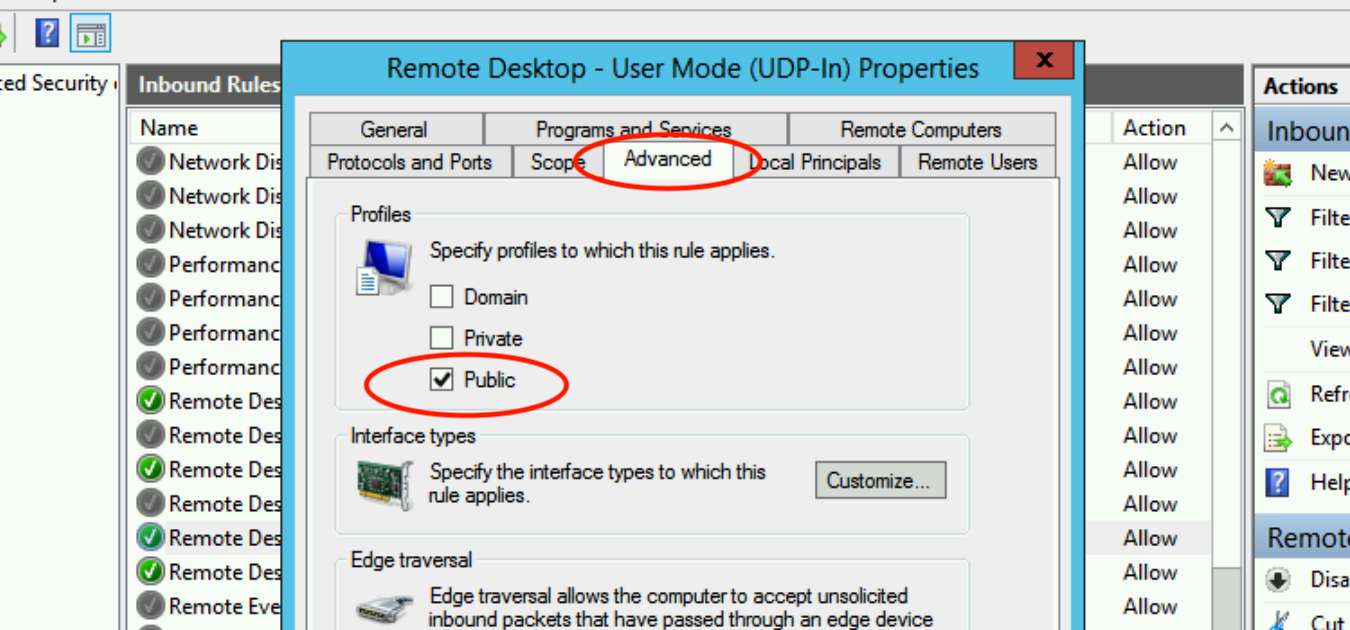
- In order to apply the “Public profile” for all the mentioned rules, double click on each rule, navigate to Advanced settings and select only Public profile
-
In case you configure a new or another IP address from inside of the Windows VM as described above, you should also update the IP address of the corresponding instance in the Instances tab. This can be achieved following the attached guideline: Update Interface IP address
-
STEP 6: Adding Ephemeral Disks
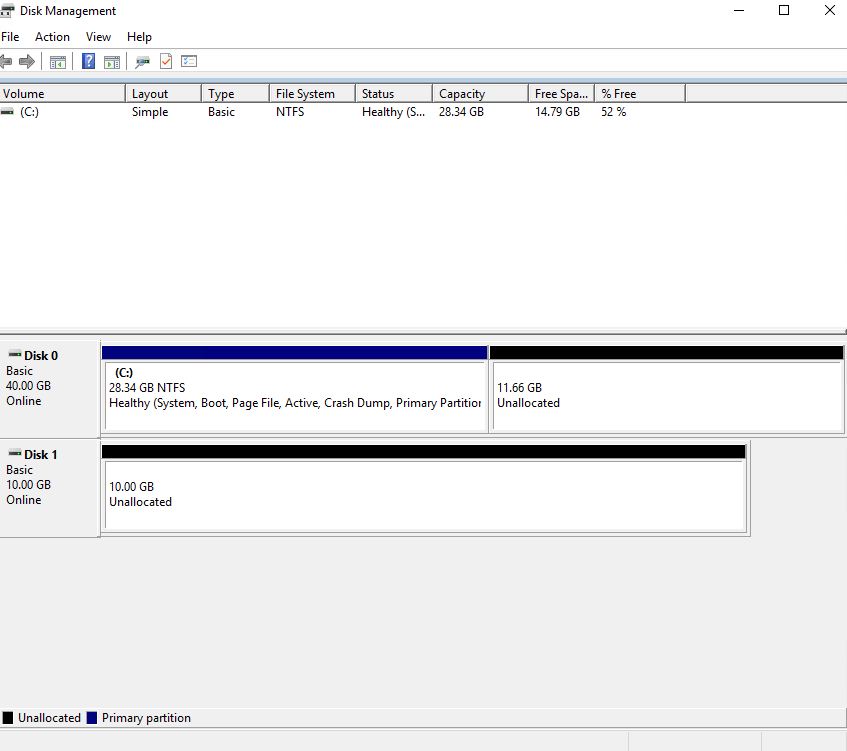
Once a new extra disk has been assigned, following the creation or the resize of a Windows Instance, the user is able to login via the console and add this additional disk volume through the Windows Disk Management. In order to achieve this, please follow the steps below :
- Right click on “Start” at the bottom left corner.
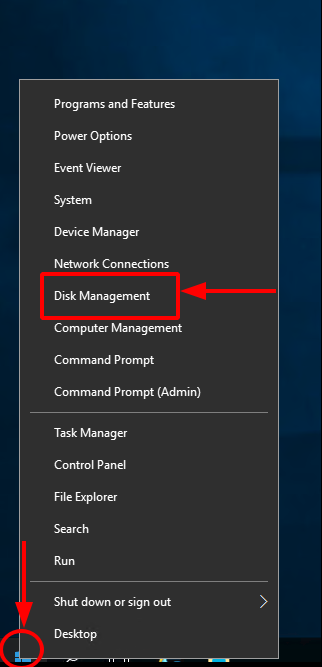
- Select the "Disk Management" option and navigate to the disk management menu.
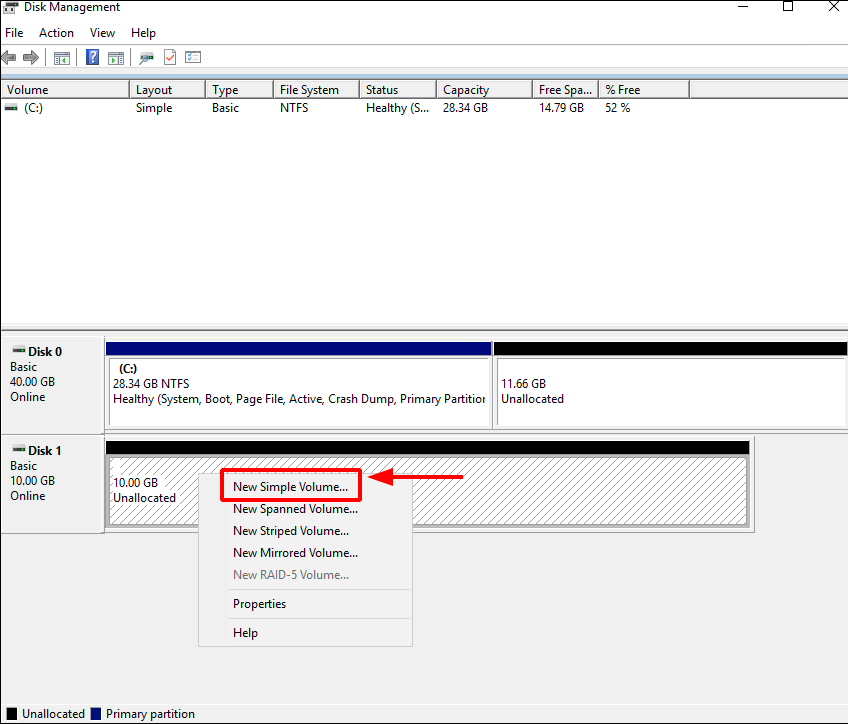
- Once you have selected this option, you are able to add the new extra disk by right clicking on the Unallocated volume and selecting the "New Simple Volume...".
-
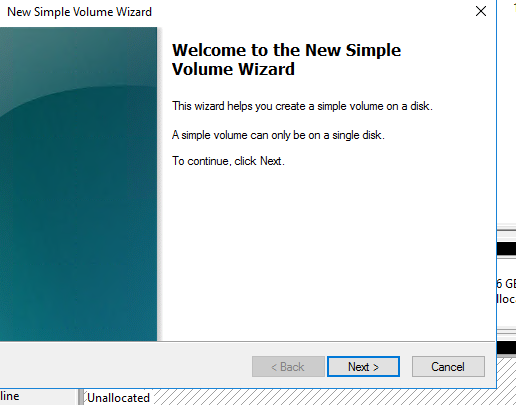
Now follow the next steps of the Volume Wizard as described below:
a. Press "Next" on the "Welcome Window".
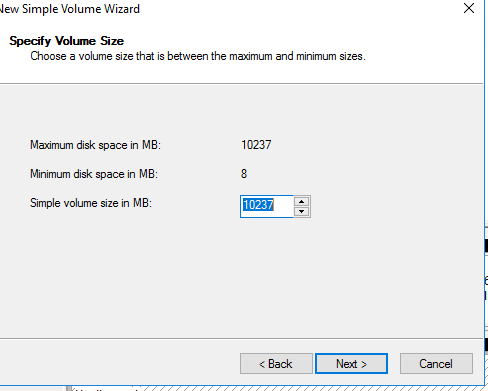
b. Specify the Volume Size
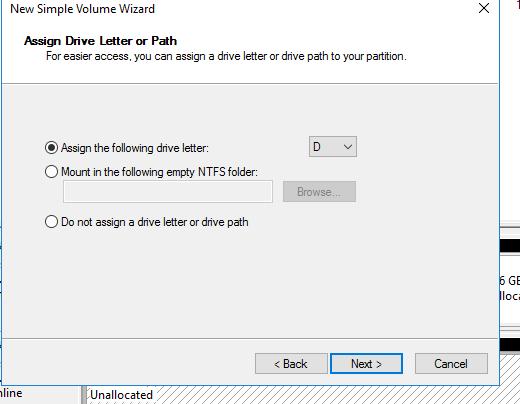
b. Assign the drive letter.
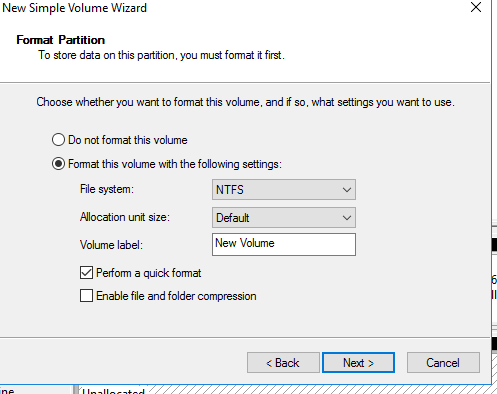
c. Select the filesystem and format the volume
d. Press "Finish" for completing the Volume Wizard
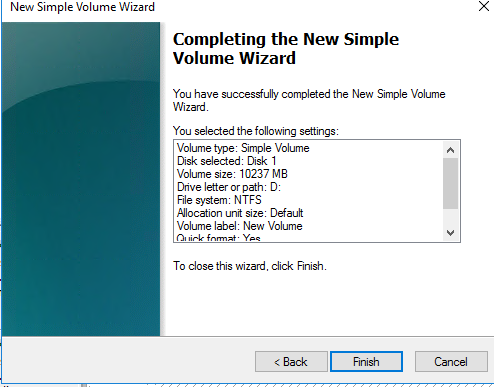
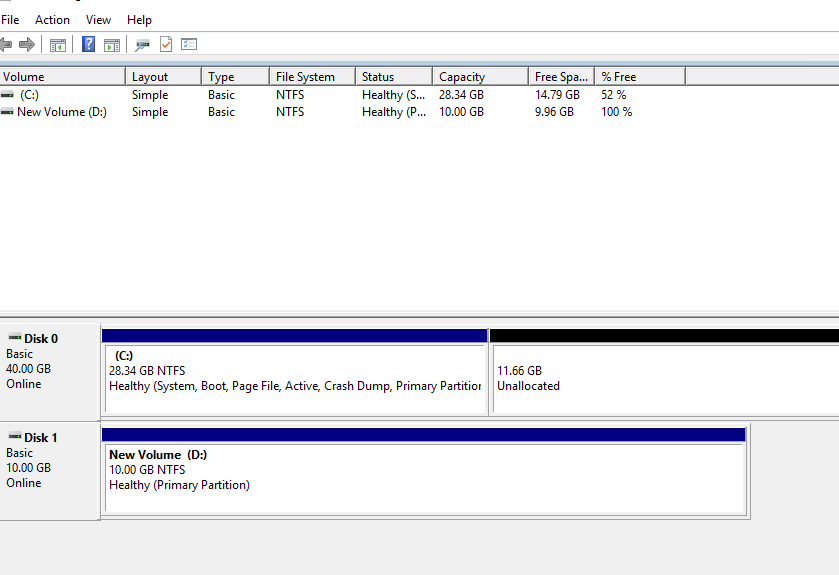
As you can notice, a new volume called (D:) has been added as a Primary Partition.
Note
The same process should be followed, in order to generate additional extra disk volumes.
-
STEP 7: Configure the MTU in Windows Server
It is advisable to check the MTU settings of the network interface. Unfortunately the DHCP option does affect Windows images due to cloud init issues with Windows templates. As a first step, you can check your MTU by doing the following.
Open an Administrator command prompt and run:
netsh interface ipv4 show interfaces
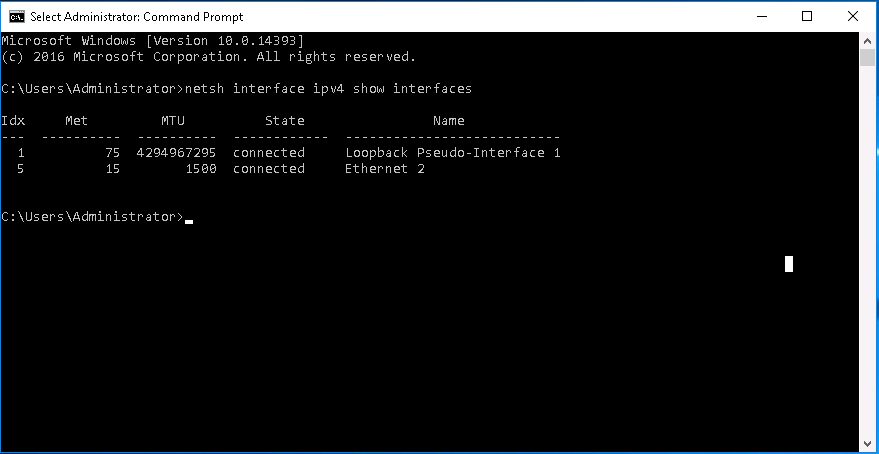
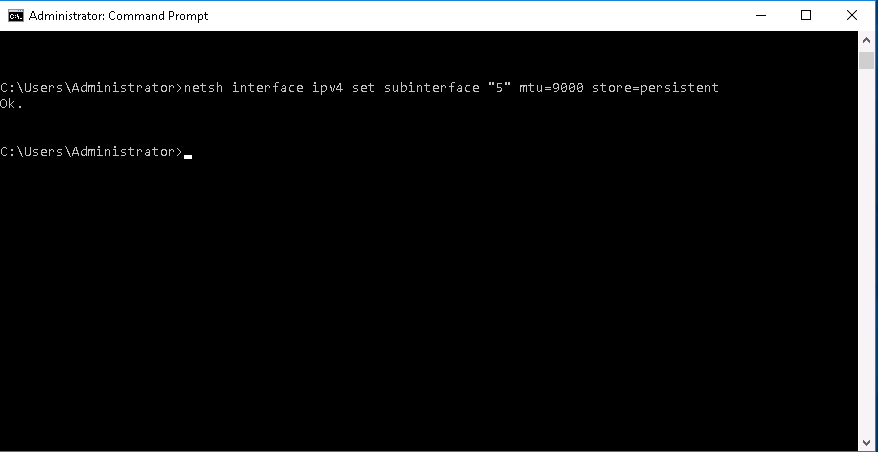
This will show you your current MTU settings. Pay close attention to the Idx # of the ethernet interface 2. You will need this information to change the MTU. To change the MTU to 9000 use this command. (you will need to replace the “5” with the Idx for your ethernet interface)
netsh interface ipv4 set subinterface "5" mtu=9000 store=persistent
Now reboot the system for the changes to be effective and test the connectivity.
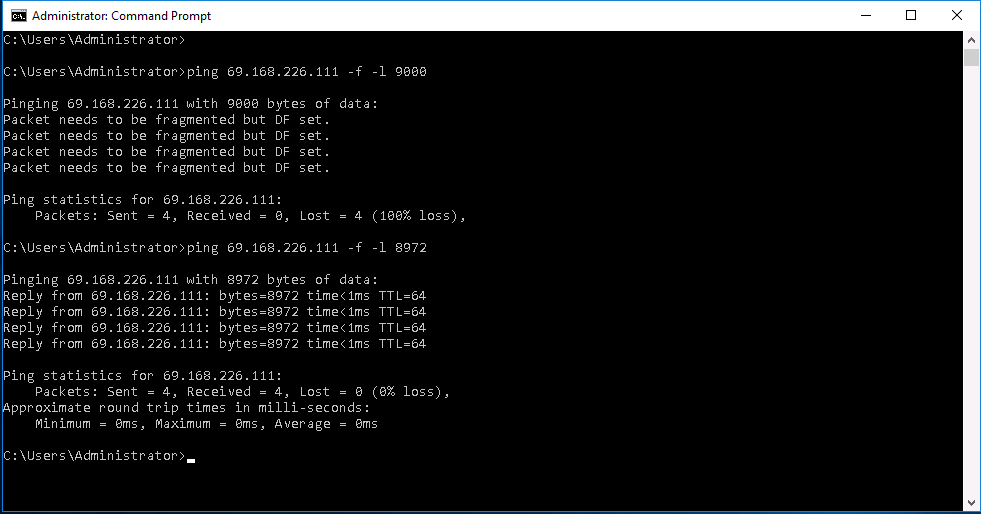
An MTU limit that is set too high can cause fragmented packets and packet loss on your connection. The following example will explain how to test if your MTU limit is sending fragmented packets and will explain how to find the effective MTU value.
We have set the MTU PPP connection size of 9000 bytes, however 28 bytes of this number is reserved for IP/ICMP overhead, so the effective MTU size in our case here is 8972 (9000-28).
In order to test the above scenario from a command line, run this command:
ping <Controller_IP_ADDRESS> -f -l <MTU size>
(The -f marks packets that should not be fragmented in the ping. -l sets the size of the packet)
Here is an example: