VLANs Switch Configuration
In Netgear model switches, Sunlight.io recommends the advanced 802.1Q-based VLAN configuration, in which the user can assign ports on the switch to a VLAN with an ID number in the range of 1–4093 and add tagged or untagged ports to a VLAN. By default, all ports are untagged members of VLAN 1.
Create 802.1Q-Based VLANs in an Advanced Configuration
-
Generating 802.1Q-based VLANs in an advanced configuration:
Step 1: The terminal (user PC) should be connected to the same network as the switch, launching the ProSAFE Plus Configuration Utility or use network IP to connect directly to the switch via ProSAFE Web Managed Switch
Step 2: Login to the Netgear switch.Enter the switch’s password in the password field.
 Step 3: Select VLAN > 802.1Q > Advanced.
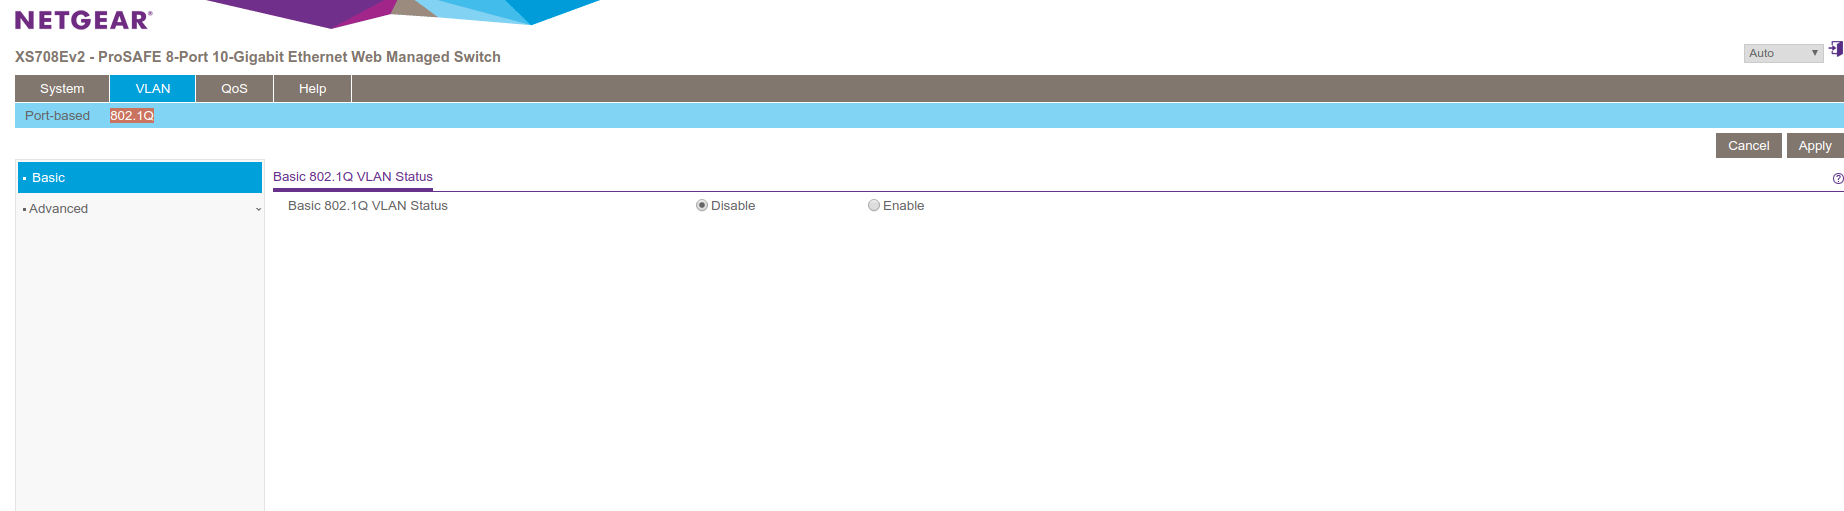
Step 4: If this is the first time accessing the Advanced 802.1Q VLAN Status page or if you are editing the VLAN assignment method, select the Enable radio button and continue to next step.
Otherwise, proceed to step 6. A pop-up window opens, informing that the current VLAN settings will be lost.
Step 5: Select Yes on the pop up window. The VLAN Identifier Setting table is displayed (image below). Depending on the type of switch used, more or less ports might be provided, all of which are members of VLAN 1 by default.
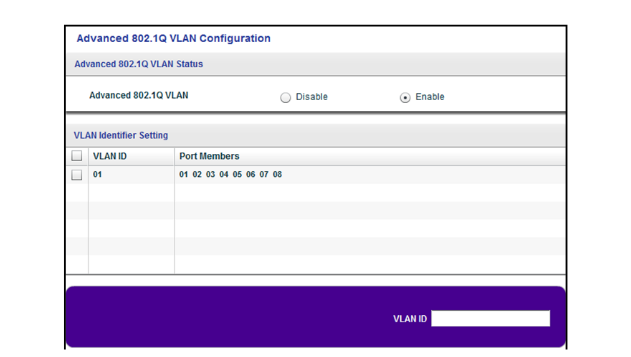
Step 6: Enter a VLAN ID in the VLAN ID field. Supported values range from 1 to 4093.
Step 7: Select the ADD button.The new VLAN is added to the VLAN Identifier Setting table. After a new VLAN ID is created, VLAN membership option should be used for adding ports to the VLAN. (Select VLAN > 802.1Q > Advanced > VLAN Membership). View next section for more details.
Note: To delete a VLAN, select the check box of the corresponding VLAN and click the Delete button
Adding Tagged or Untagged Ports to an 802.1Q-Based VLAN
While adding ports to a VLAN, it should be specified whether the ports must be tagged or untagged. Port tagging allows a port to be associated with a particular VLAN and allows the VLAN ID tag to be added to data packets that are sent through the port. The tag identifies the VLAN that must receive the data. By default, all ports are untagged.
-
In order to add tagged or untagged ports to an 802.1Q-based VLAN:
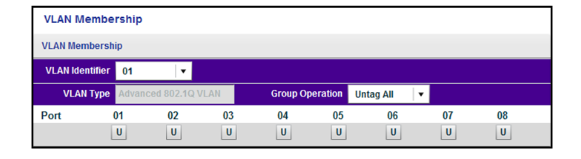
Step 1: Select VLAN > 802.1Q > Advanced > VLAN Membership. VLAN Membership can be selected only if the advanced 802.1Q VLAN option is enabled. All available ports of VLAN ID 1 are assigned untagged by default as illustrated in the figure below.
Step 2: In the VLAN Identifier menu, select the VLAN
Step 3: Select the ports that you want to add to the VLAN by performing the following:
a. (Optional) In the Group Operation menu, select Untag All, Tag all, or Remove all.All ports are either added to the VLAN (tagged or untagged) or removed from the VLAN. b. Select individual ports and assign them as tagged (T), untagged (U) or remove individual ports, the ports, by selecting the check box under the port numbers. c. Click the APPLY button. The updated settings are saved. In the VLAN Membership table, the ports are displayed as members of the VLAN.
The following figure is an example with ports 3,4 and 6,7 assigned as tagged and port 8 assigned as untagged. Depending on the type of switch used, more or less ports might be provided.

Step 4 (Optional): To select ports for another VLAN, repeat step 2 and step 3 in this section.
Step 5: In order to verify the selected ports, select VLAN > 802.1Q > Advanced > VLAN Configuration, where the status page is displayed.The added ports are displayed next to VLAN and/or VLANs respectively.
Specify PVID Ports for an 802.1Q-Based VLAN
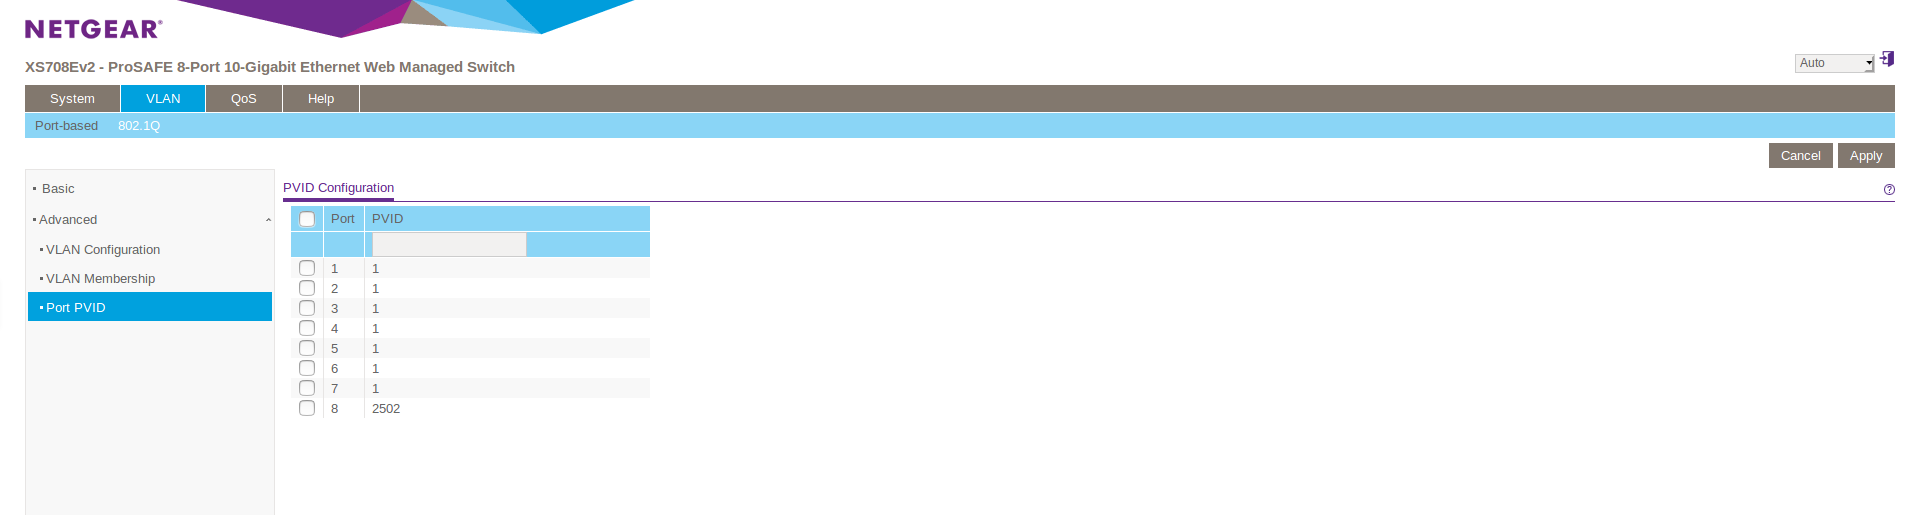
A default VLAN ID (PVID) port is a VLAN ID tag that the switch assigns to data packets it receives, which are not already addressed (tagged) to a particular VLAN. For example, If there is a connected device (computer/switch) on port 8, which needs to be a part of VLAN 2502, port 8 has to be configured to automatically add a PVID of 2502 to all data received from the device. This step ensures that the data from the device on port 8 can only be viewed by other members of VLAN 2502. Only one PVID can be assigned to a port. The following figure displays such an example.
-
Assigning a PVID to one or more ports:
- Select VLAN > 802.1Q > Advanced > PVID. Port PVID can only be selected if the advanced 802.1Q VLAN option is already enabled.
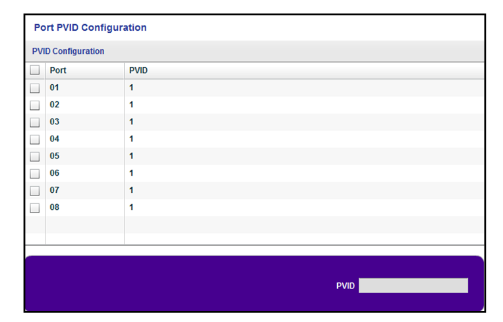 The figure above displays the default configuration. Depending on the type of switch used, more or less ports might be provided.
-
Select one or more ports.
-
Enter the PVID. A PVID can only be entered for an existing VLAN.
4.Click the APPLY button.
The updated settings are saved.