Intel Bobcat Peak System
The Sunlight Enterprise Software product is fully supported by the Intel Bobcat Peak system.

Server Board + Chassis
The base system is the Intel Server Board HNS2600BPB24 which we recommend inserting into the 4-node 2U Intel H2000P Chassis.
CPU Type + RAM
The boards must be fully populated with dual Xeon-compatible sockets (recommended Skylake 10 core Xeon Silver 4114) and a minimum of 128GB RAM (recommended 192GB with 12x16GB DDR4 2666MHz).
Network IO Interfaces
Server boards come with dual 10gbit LOM interfaces.
Storage IO interfaces
For the best performance, an all NVMe Flash SSD storage is required. Intel supports a variety of NVMe drives for the proposed systems (recommended 2x2TB P4500 or 2x2TB P4800x Optane drives).
System BIOS Settings
In order to run the Sunlight Enterprise Software smoothly and obtain the best performance, please configure the BIOS settings as follows.
-
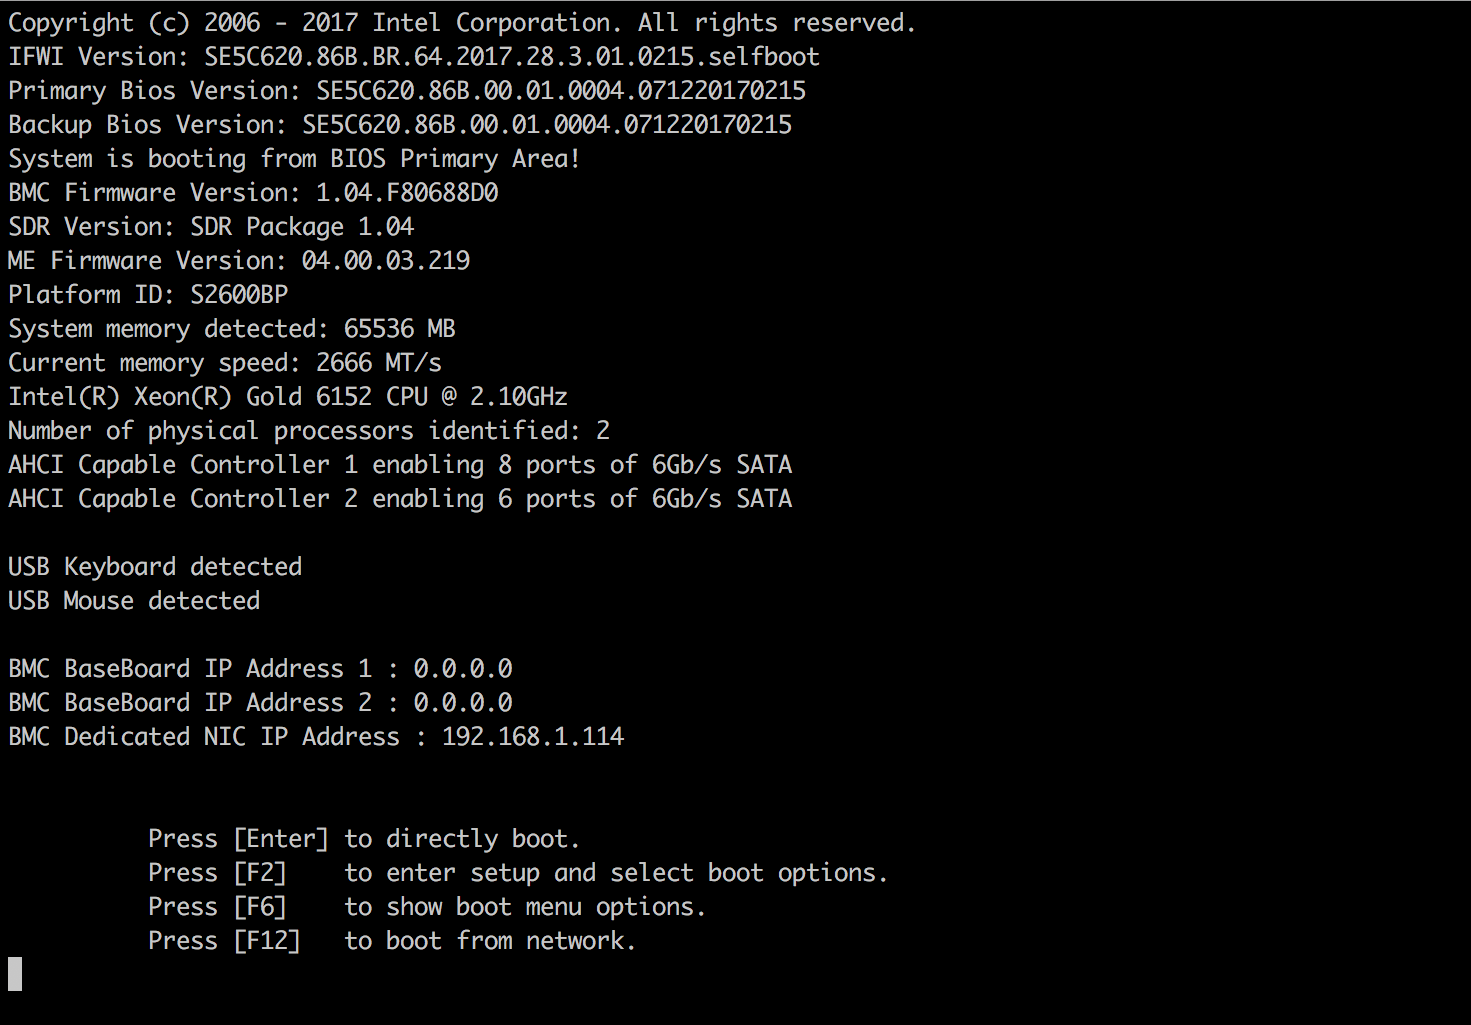
Step 1: Press F2 to enter BIOS settings
-
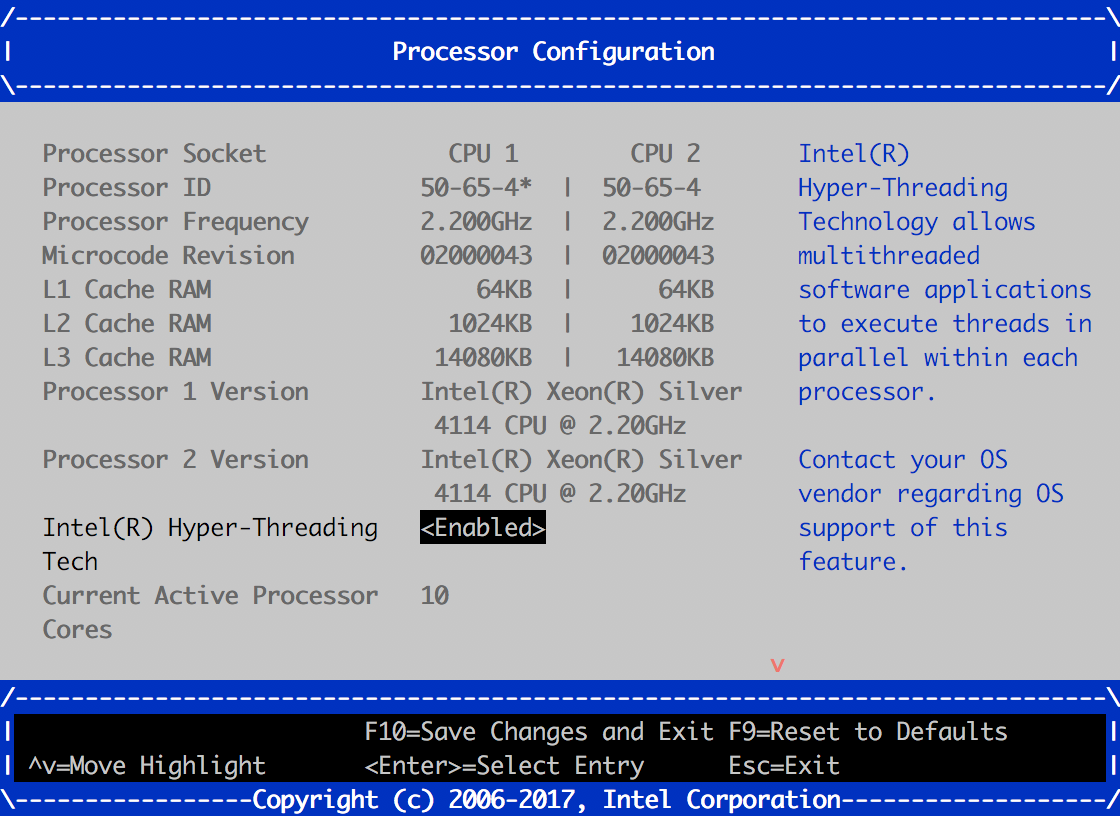
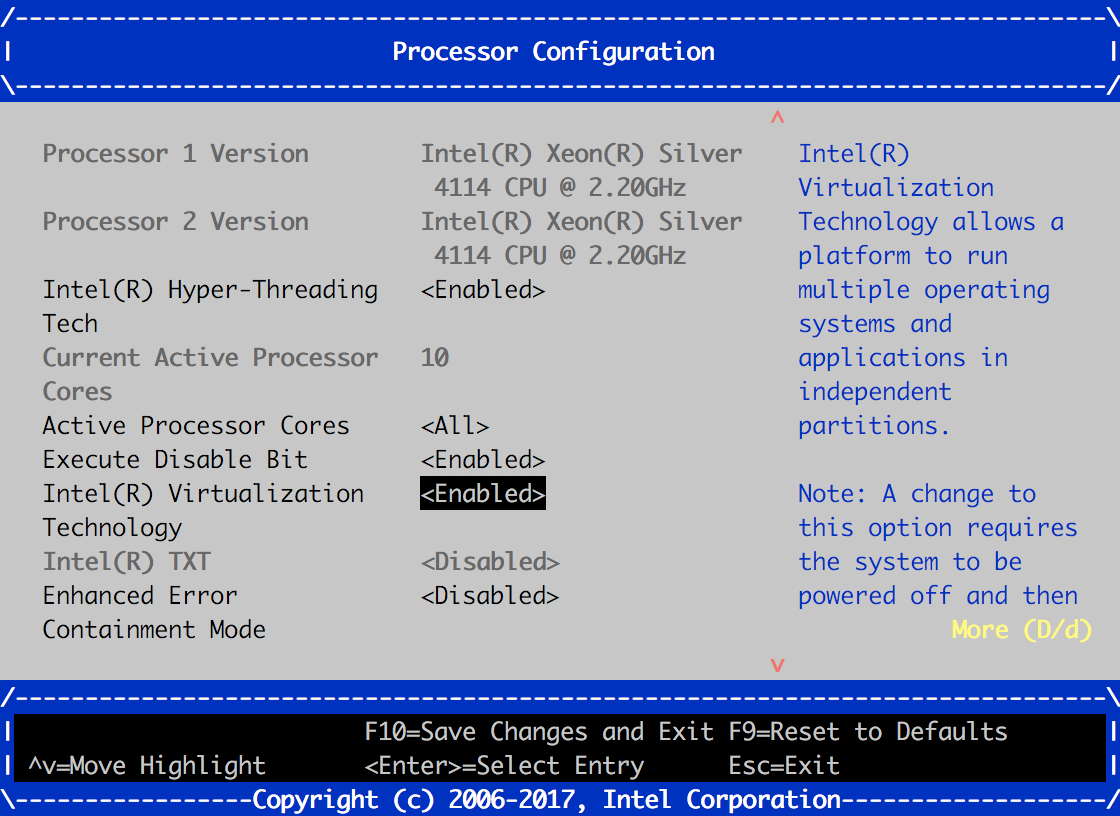
Step 2: Go to “Advanced > Processor Configuration"
- Set "Intel(R) Hyper-Threading Tech" to “Enabled".
- Set "Intel(R) Virtualisation Technology" to “Enabled".
- Set "Intel(R) Hyper-Threading Tech" to “Enabled".
-
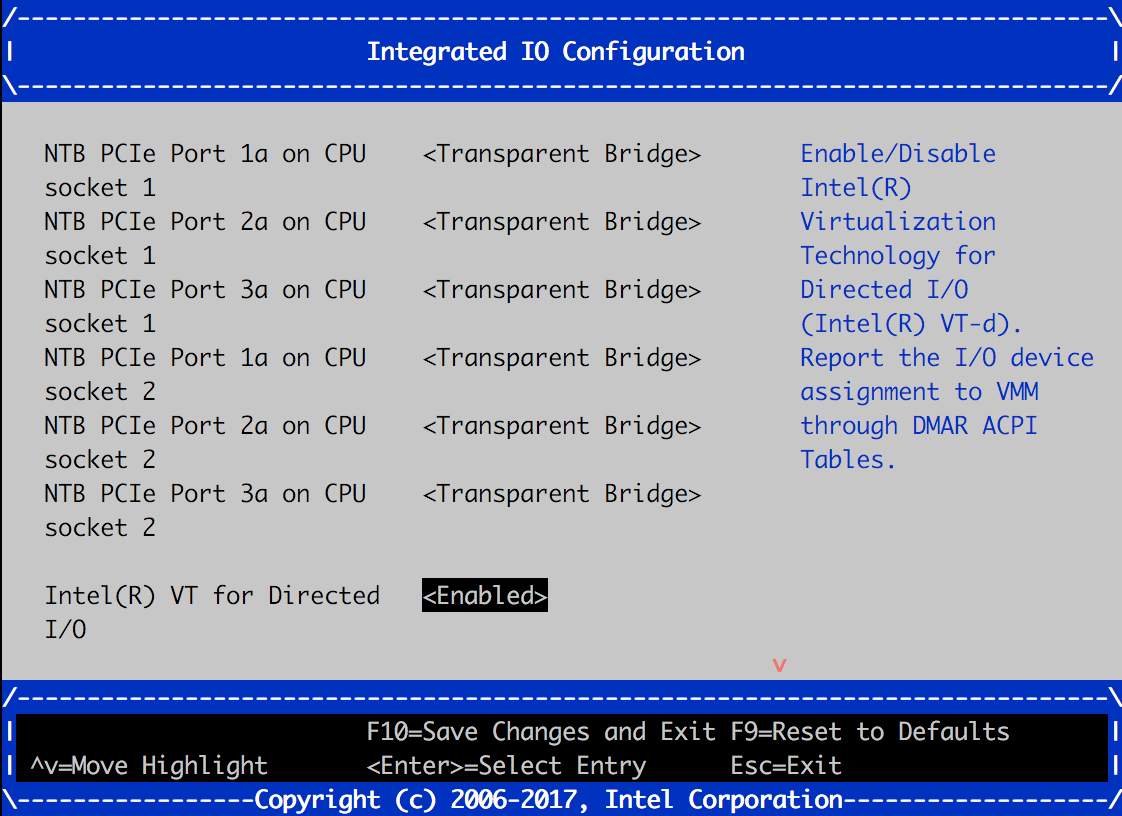
Step 3: Go to “Advanced > Integrated IO Configuration"
- Set "Intel(R) VT for Directed I/O” to “Enabled".
- Set "Intel(R) VT for Directed I/O” to “Enabled".
-
Step 4: Go to “Advanced > PCI Configuration > Volume Management Device"
- Set "CPU2 Volume Management” to “Disabled".
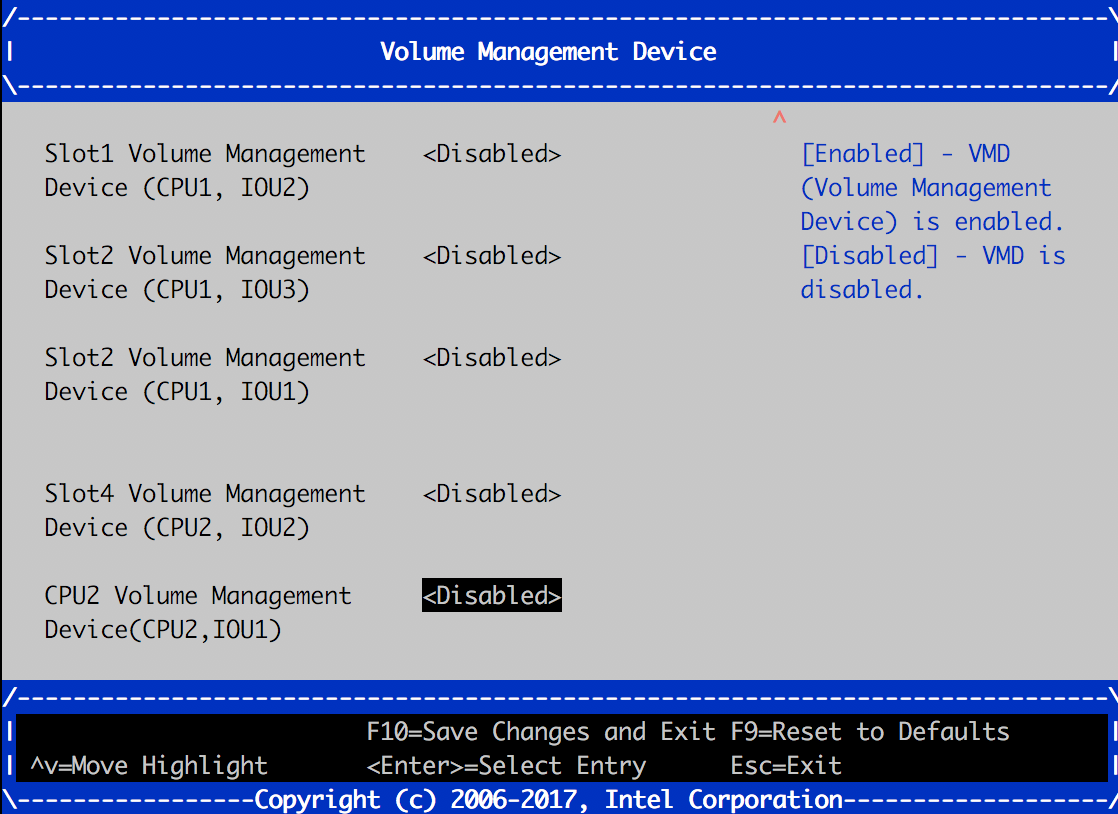
- Set "CPU2 Volume Management” to “Disabled".
-
Step 5: Go to “Boot Maintenance Manager > Advanced Boot Options"
- Set “Boot Mode” to “UEFI”;
- Set "USB Boot Priority” to “Enabled".

-
Step 6: Go to “Boot Maintenance Manager > Change Boot Order"
- Review the boot order list and make sure the first/top entity is “UEFI xxx” (e.g “UEFI SanDisk”) when the USB installation drive is plugged in, or “UEFI Misc Device” when the USB installation drive is not plugged in.
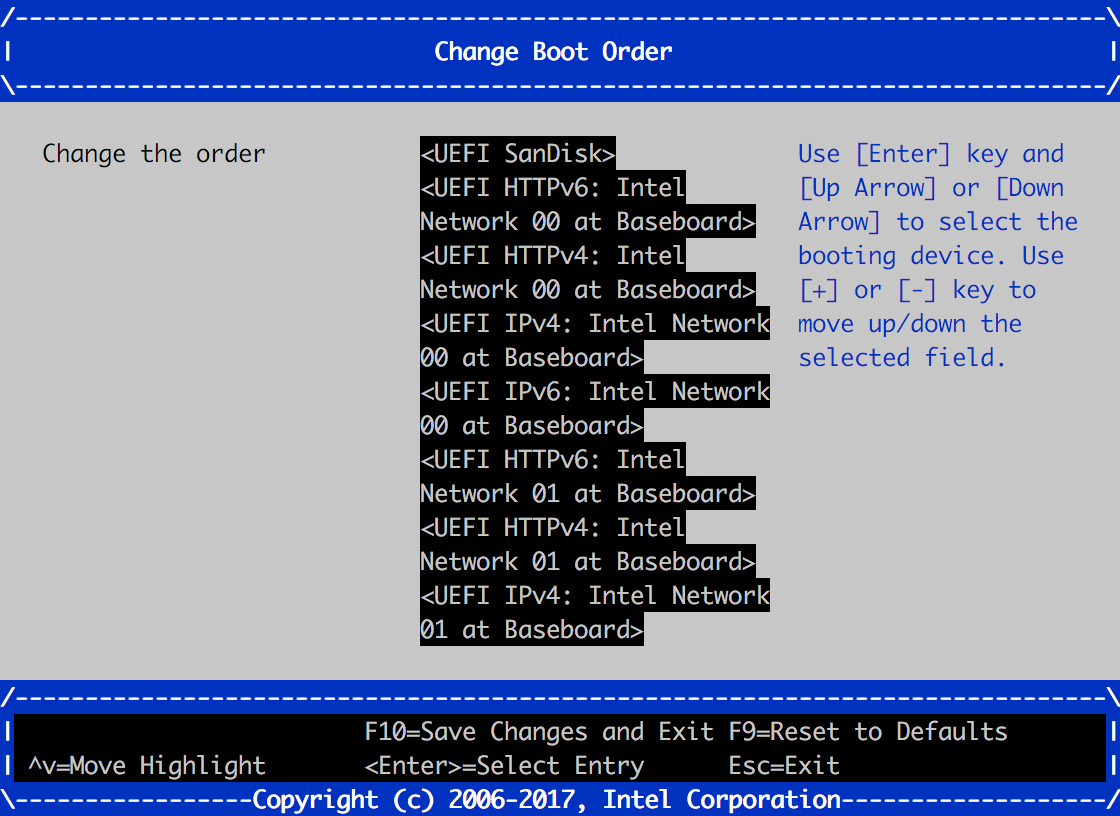
- Review the boot order list and make sure the first/top entity is “UEFI xxx” (e.g “UEFI SanDisk”) when the USB installation drive is plugged in, or “UEFI Misc Device” when the USB installation drive is not plugged in.
The following settings should be applied only if IPMI remote server management is required.*
-
Step 1: Go to "Server Management > Console Redirection"
- Configure "SOL for Dedicated Management NIC” to “Enabled".
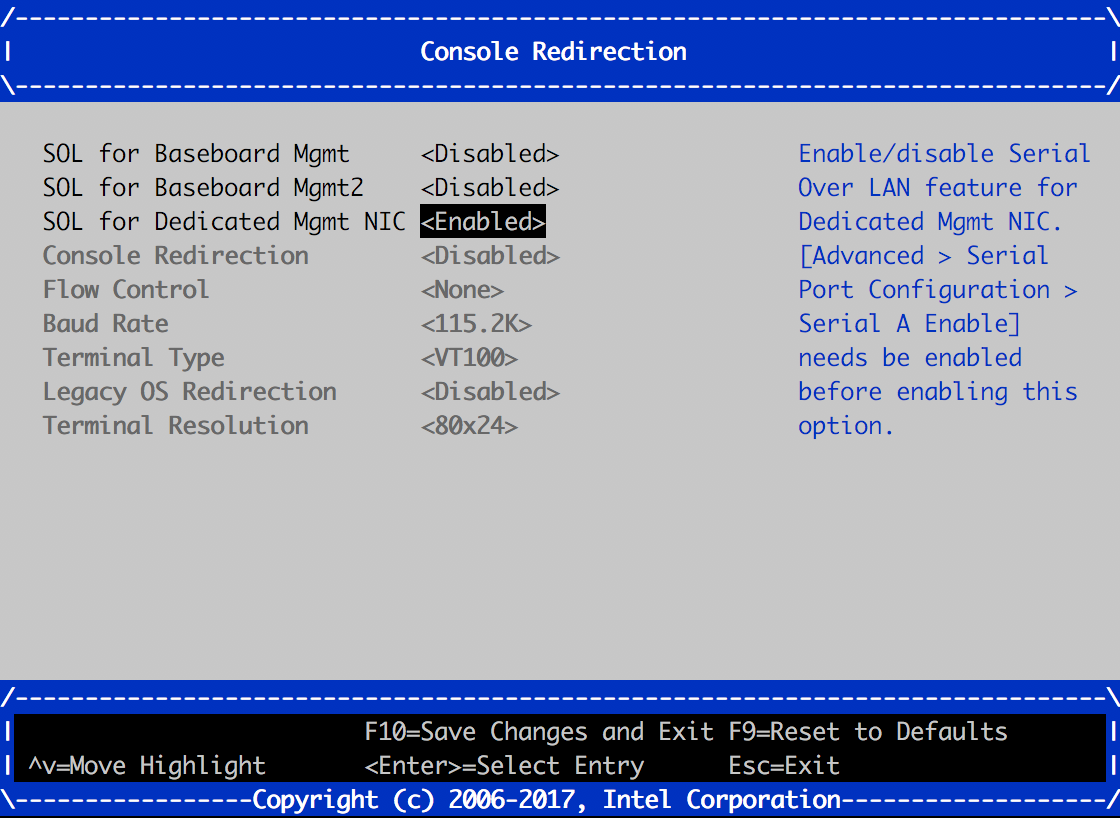
- Configure "SOL for Dedicated Management NIC” to “Enabled".
-
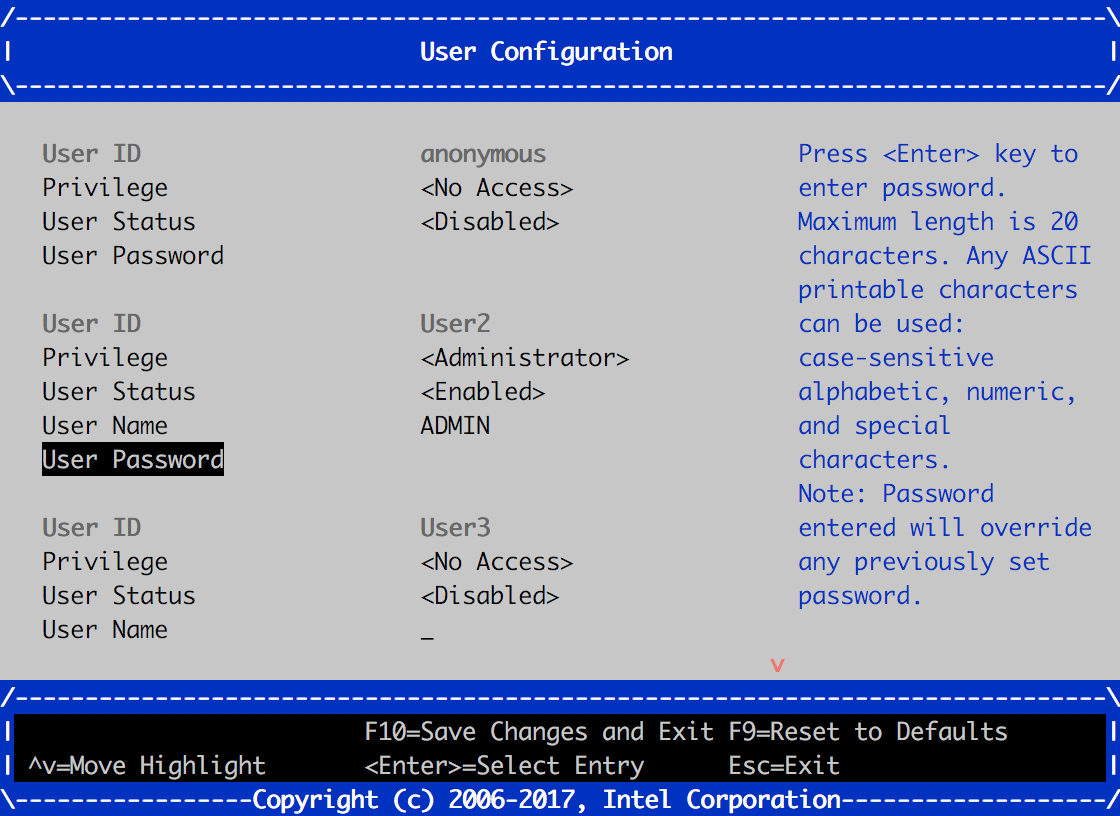
Step 2: Go to “Server Management > BMC LAN Management > User Configuration”
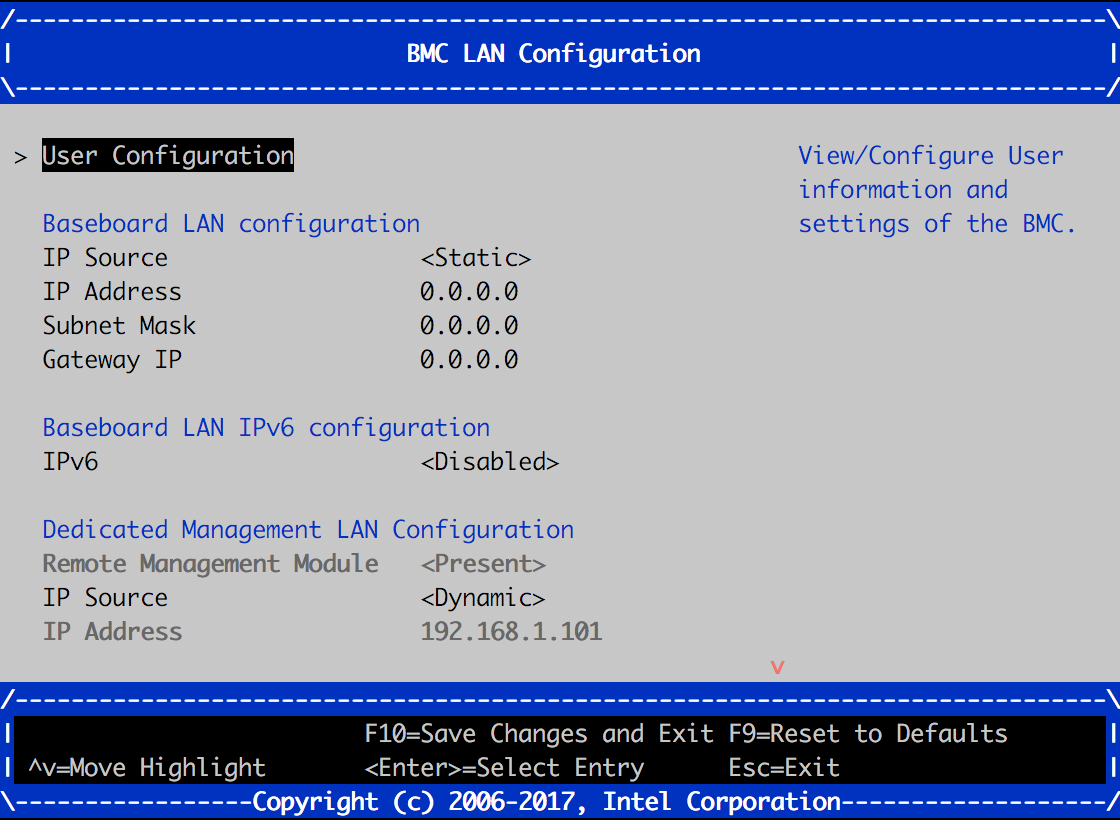
-
Step 3: Configure “User 2”, by setting the following parameters:
- Privilege: Administrator.
- User Status: Enabled
- User Name: - <USERNAME>
- User Password: - <PASSWORD>
-
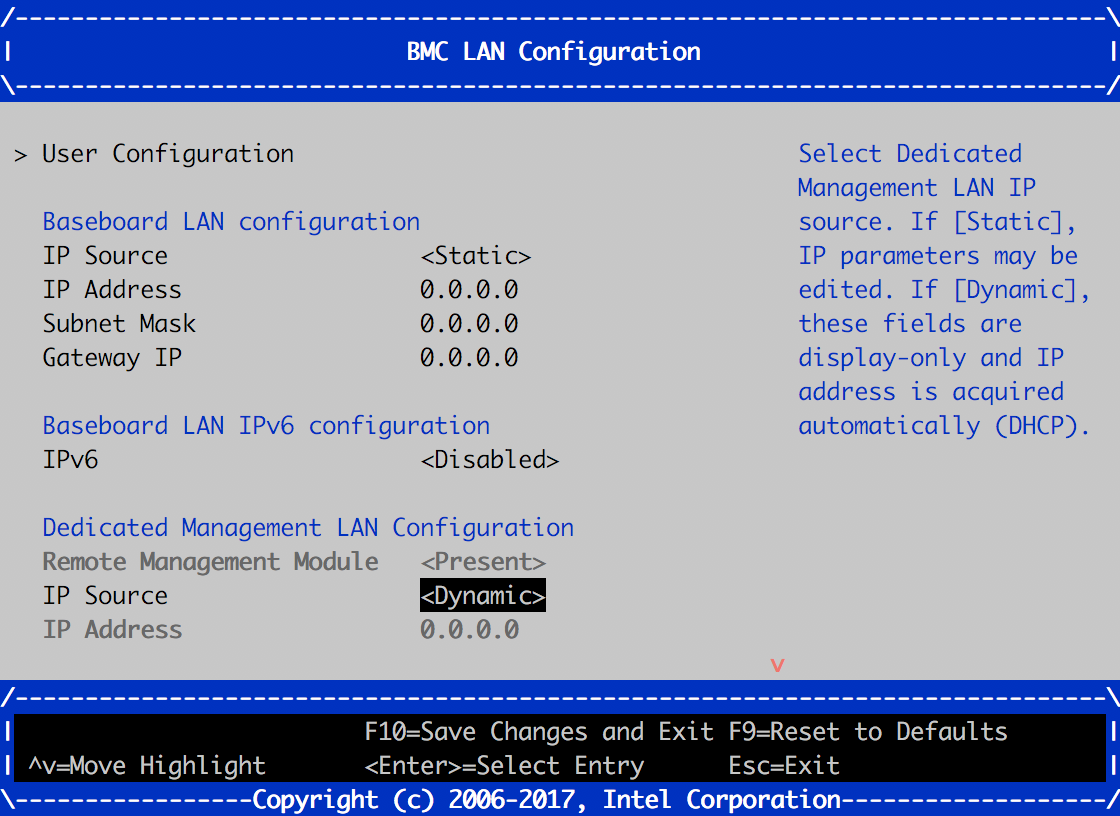
Step 4: Go to "Server Management > BMC LAN Management"
- Under "Dedicated Management LAN Configuration”, configure "IP Source" to “Dynamic".
- Under "Dedicated Management LAN Configuration”, configure "IP Source" to “Dynamic".