Virtual Disks (vdisks)
A virtual disk, called vdisk, is a part of the space of a datastore which needs to be allocated for the provision of an Instance. At least one vdisk is attached during the creation of an instance, in order to accomodate and store all of the required data.
The vdisks tab provides information on the vdisks that have been allocated on your system:

| Resource | Value |
|---|---|
| ID | The unique ID of the vdisk that exists on the system. |
| Name | The name of the vdisk on the system. |
| Type | The type of each vdisk. Currently five(5) types of vdisks are supported. |
| Status | The progress status of a vdisk. At the moment, the system supports four (4) different kinds of vdisk status. |
| Attached to | The name of the instance the vdisk is attached to. Click the NAME to view the following details: |
| Volume name | The id name of the volume the vdisk is mapped to. |
| Size | The amount of space (GB) which is allocated for the vdisk on the system. |
| Datastore | The datastore to which the vdisk belongs. |
| Replicas | The total amount of the vdisk's replicas. |
| Actions | The 'cog' icon with the list of available actions for the vdisk. Currently, the 'Create snapshot' action can only be applied on a root type vdisk. The 'New template' and 'Delete' actions are available for the snapshot and orphan type vdisks and the 'Rename vdisk' can be applied on all of the above mentioned vdisk types. |
Note
- Use the search box above the vdisk list to filter vdisks available in your system.
- Select 'Hide Reserved Vdisks', in order to exclude vdisks that are already reserved by the system from the vdisk list.
The user can select the Grid view option for displaying the list of the existing vdisks, as depicted on the image below.

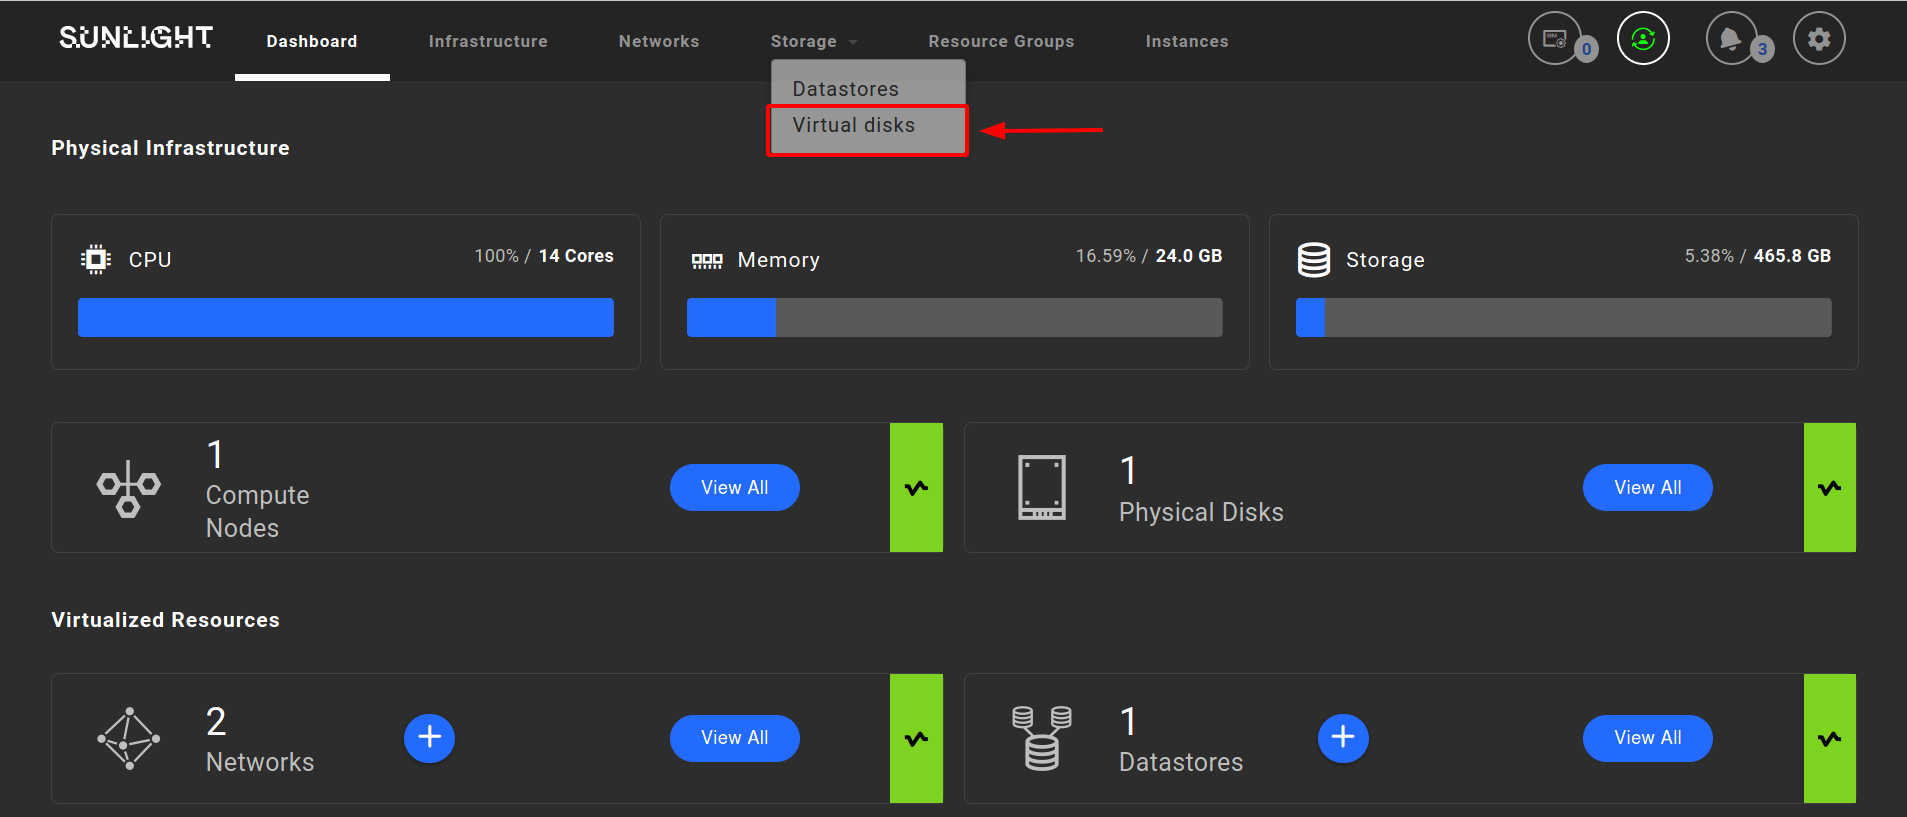
In order to view the existing Virtual disks (vdisks) on the system and perform actions on them, you can navigate to the Vdisk tab through the Storage tab on the Sunlight dashboard, as illustrated below.
Briefly, in order to manage vDisks:
- Navigate to the Storage tab.
- Select the vDisk subtab.
- Click on the configuration option of each vDisk, in order to execute one of the following available actions
Create snapshot action
The user can create a snapshot of a vDisk which is already attached to an existing Instance. This snapshot is an exact copy of the Instance's vdisk at that point in time and can be used as a backup.
Note
- You can replicate an attached vDisk as many times as required, however you are not able to create an additional copy from an existing replica.
- In order to create a snapshot vDisk , the Instance of the attached vDisk is required to be in ACTIVE or SHUTOFF state.
So in order to create a vDisk snapshot, you should click on the actions 'cog' and select the Create snapshot' option.

Upon selecting the 'Create snapshot' option, a pop-up window is displayed for choosing in which datastore you wish to store this vDisk snapshot, as shown in the the following image.

Now you can confirm this action by clicking on the 'OK' button and a new copy of the vDisk is starting to be created. This copy can be used once the status becomes active.

New Template action
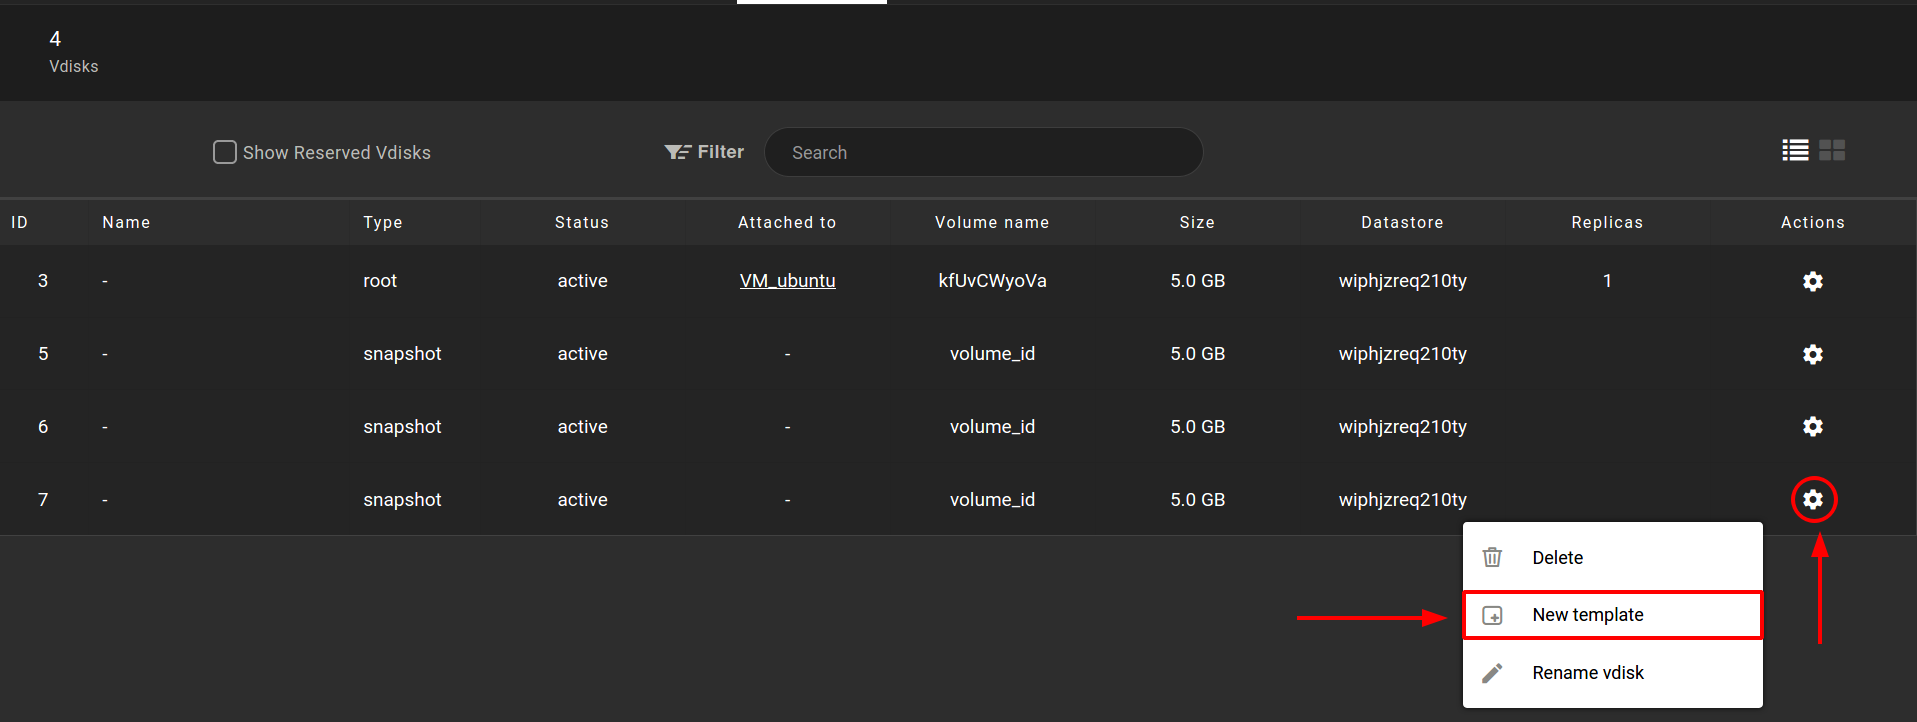
This action allows you to create a new Sunlight Template from a specific snapshot. You are able to select the 'New Template' action by clicking on the configuration option, as depicted below.
Type a discrete name for this new template and select 'Create'.

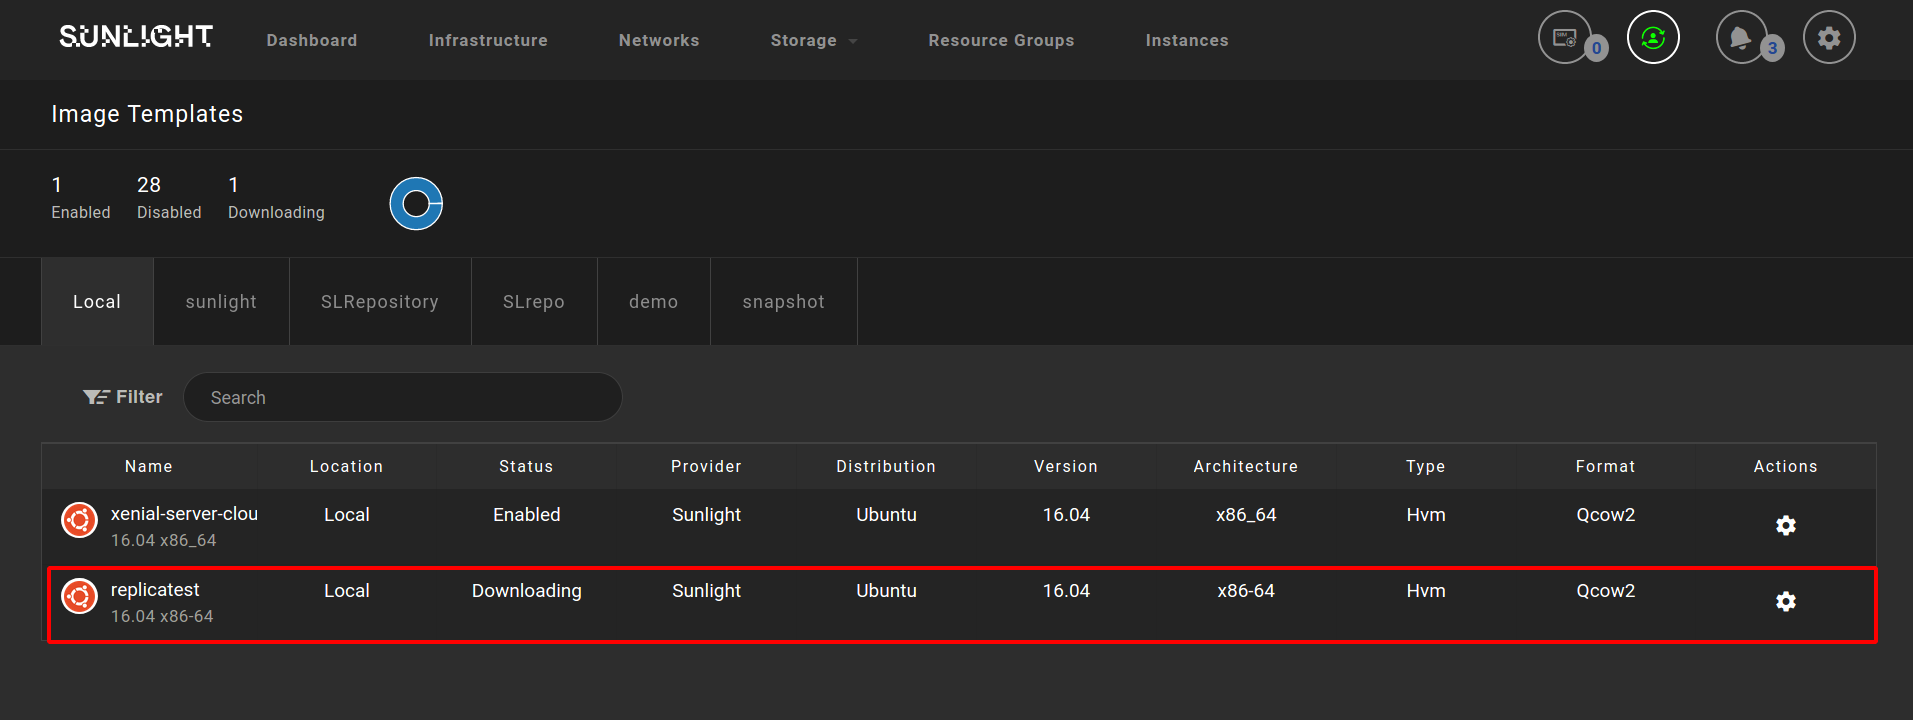
The template you have recently created will be added into the available template list at the local area of the Sunlight template manager. You can review this new template by navigating to the 'Image Templates' page.
Delete action
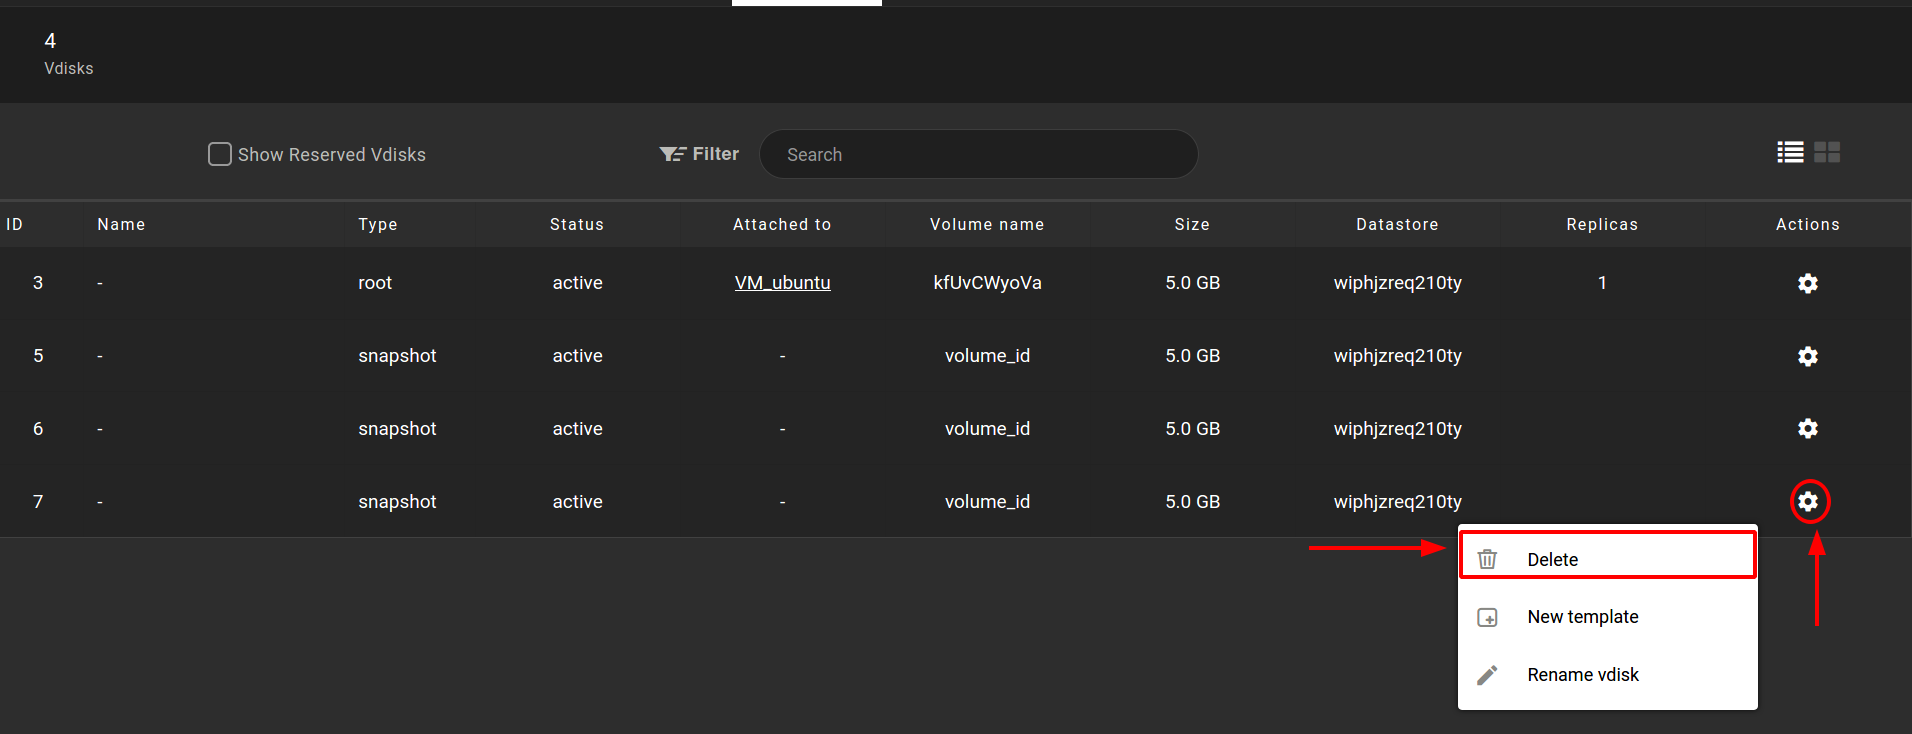
As mentioned above, the user is able to delete one of the available vDisks from the list in case these vDisks are either of "orphan" or "snapshot" type. This can be performed by clicking on the actions 'cog' of the selected vDisk and choosing the 'Delete' tab, as illustrated in the following image.
Now confirm the delete action for the corresponding vDisk and click 'OK'

Rename vDisk action
Any type of the available vDisks from the list can be renamed. The user can click on the actions 'cog' and select the 'Rename vDisk' tab, in order to rename a vDisk from the list.
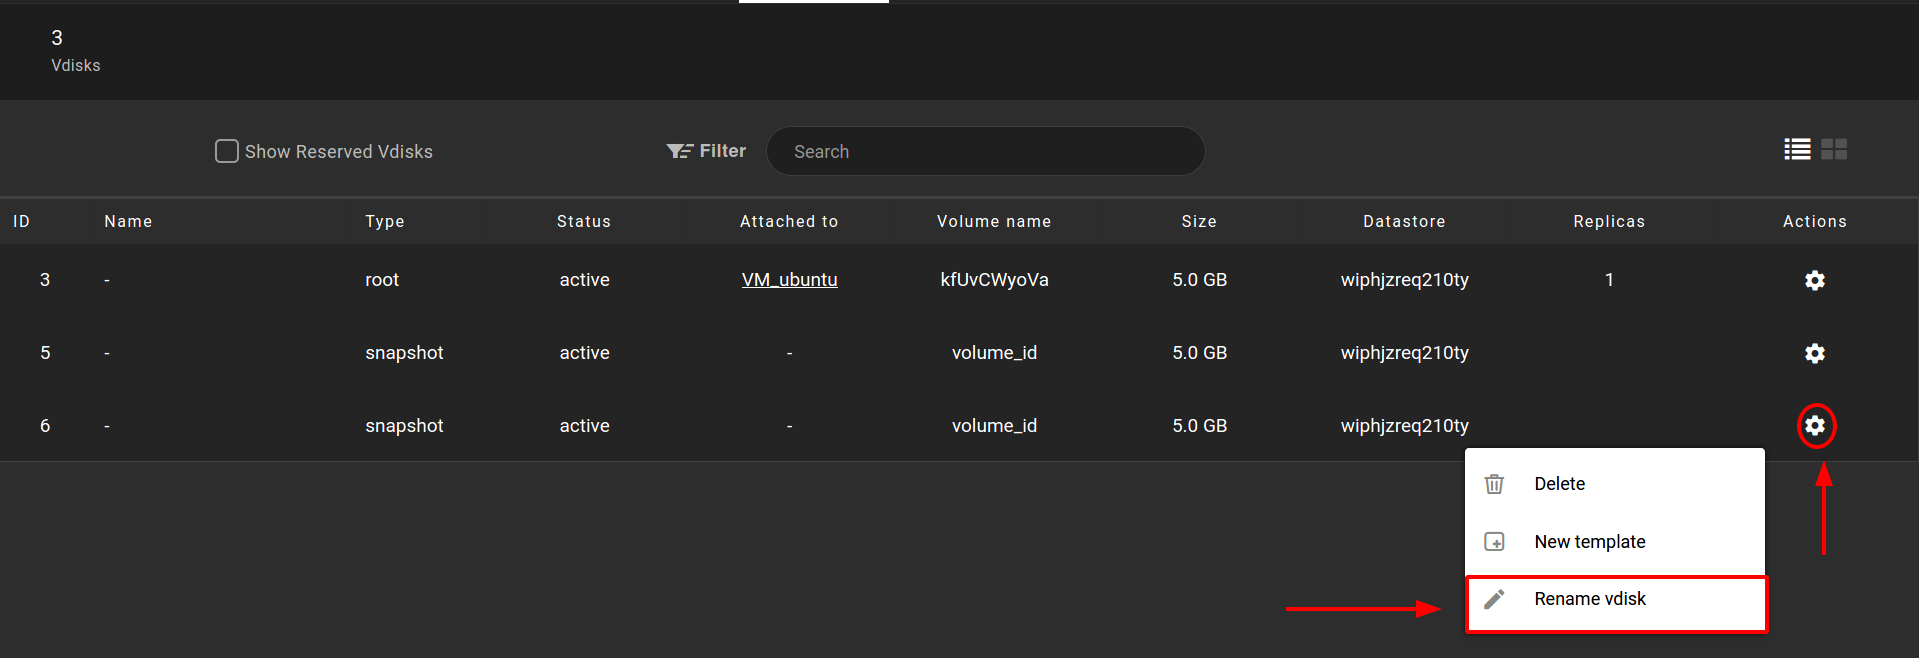
Type a new name for the vDisk and confirm your selection.

The selected vDisk has been renamed successfully, as it can be noticed in the following image.
