Getting Started
The Sunlight Infrastructure Manager Dashboard is the fastest and recommended way to deploy and manage Sunlight clusters both in AWS and on-premise. It provides a single pane of glass to manage and monitor resources, take backups, move workloads around and deploy clusters on demand in AWS. It can be deployed instantly on-demand from the AWS marketplace as a free product and be up and running within minutes.
Sunlight Infrastructure Manager Deployment steps
The Sunlight on AWS Dashboard AMI is available through the AWS marketplace as a free AMI and is fast and simple to deploy by following four simple steps.
STEP 1 - Subscribe to the Sunlight products via the AWS marketplace
To use the Sunlight products from the AWS marketplace you must firstly subscribe to the two Sunlight products on offer on the Marketplace.
When you follow the link above which searches for Sunlight on the AWS marketplace you should see something like the following:
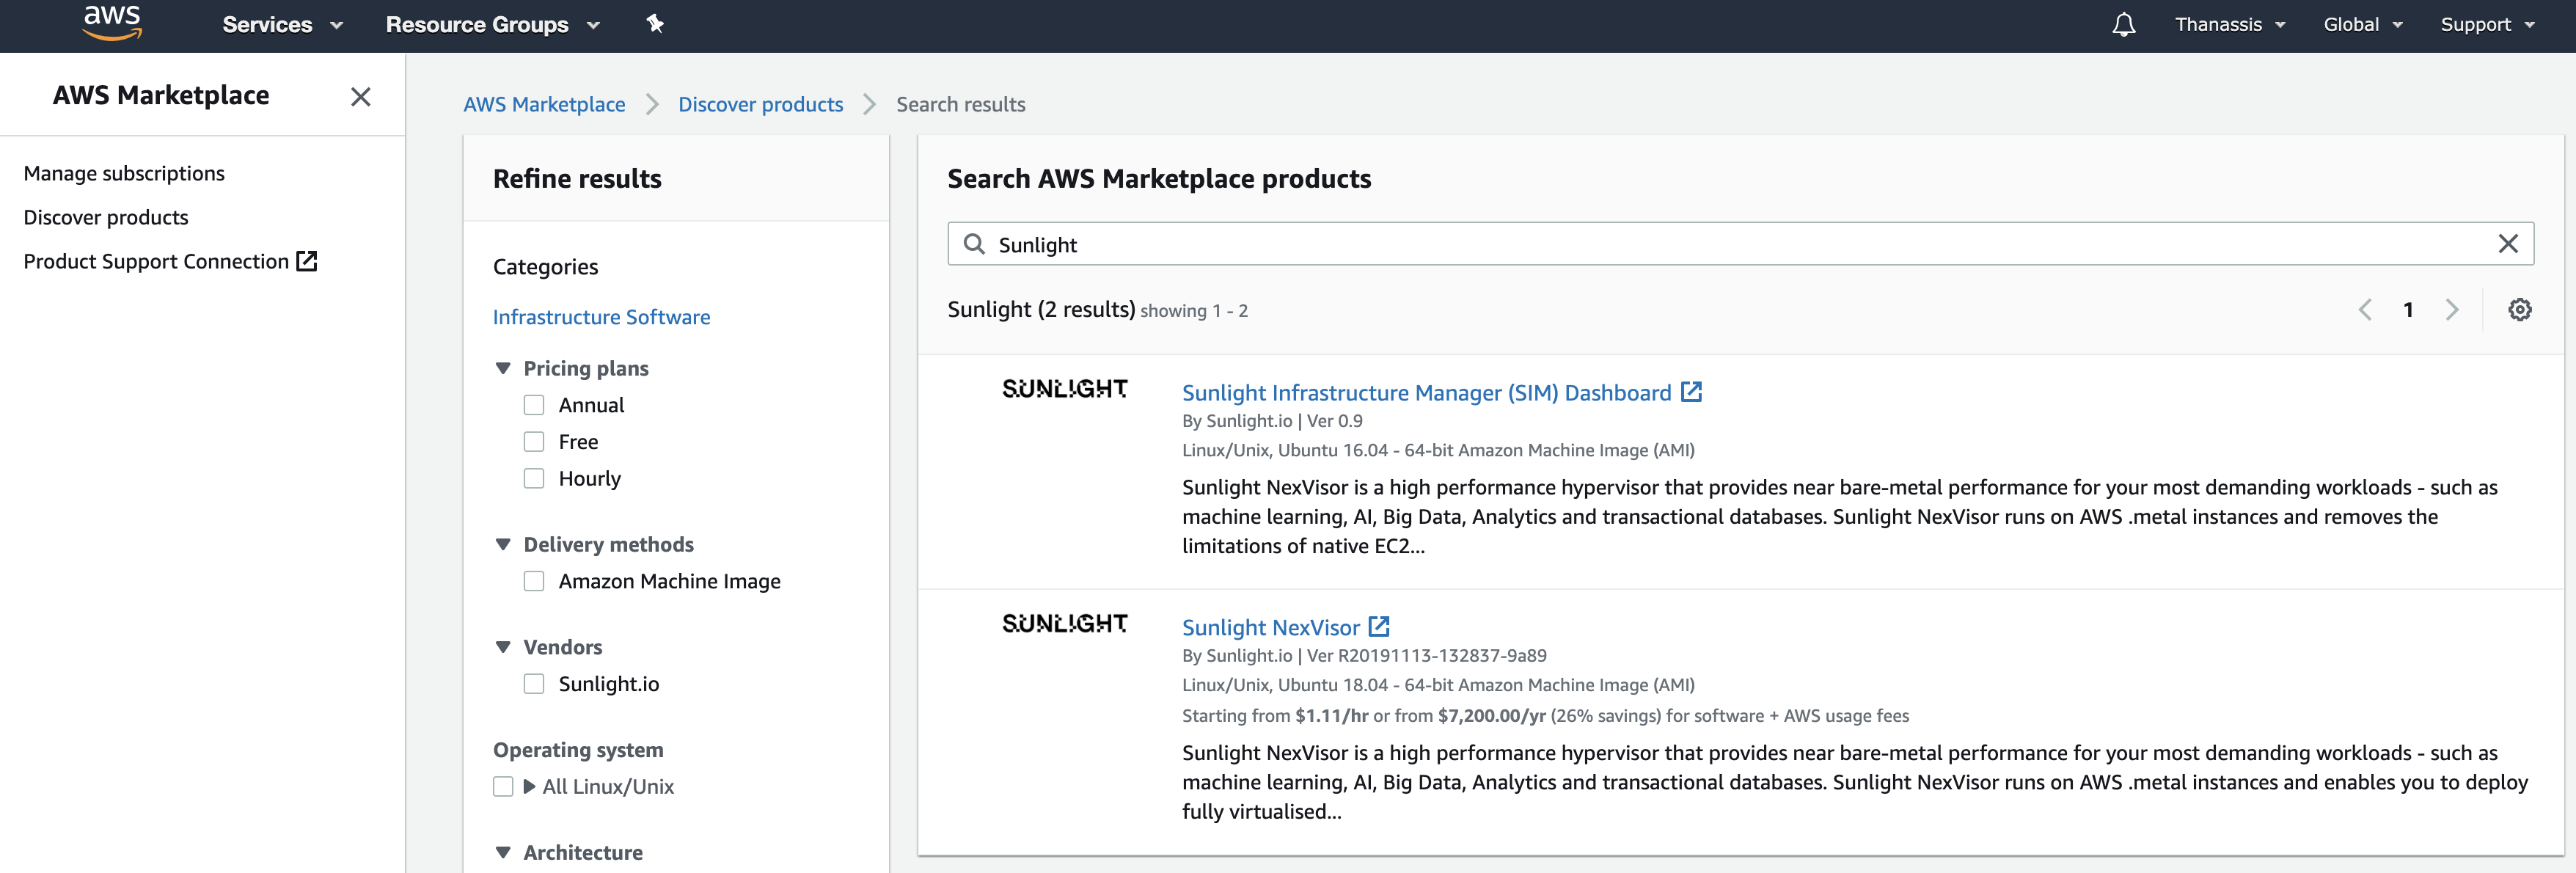
You will need to subscribe to both products; the SIM as well as the NexVisor.
STEP 2 - Create a Sunlight on AWS Dashboard VM
In order to deploy a Dashboard VM you can now select the AMI from the AWS marketplace images (using either the AWS Console, or AWS CLI/API).
When creating the instance, make sure that the http, https and ssh services are allowed in the Network Security Group configuration.
Make a note of the AWS assigned public IP address and the random AWS assigned instance ID of your new SIM instance.
STEP 3 - Login to your new SIM and change the default password
From your AWS console you can find the AWS assigned IP address and the instance ID of your new SIM instance. We recommend assigning an elastic IP address and then generating an SSL certificate. This is also described in the optional steps below.
In your browser window, enter the IP address of the new SIM instance you have deployed and the following screen should appear:
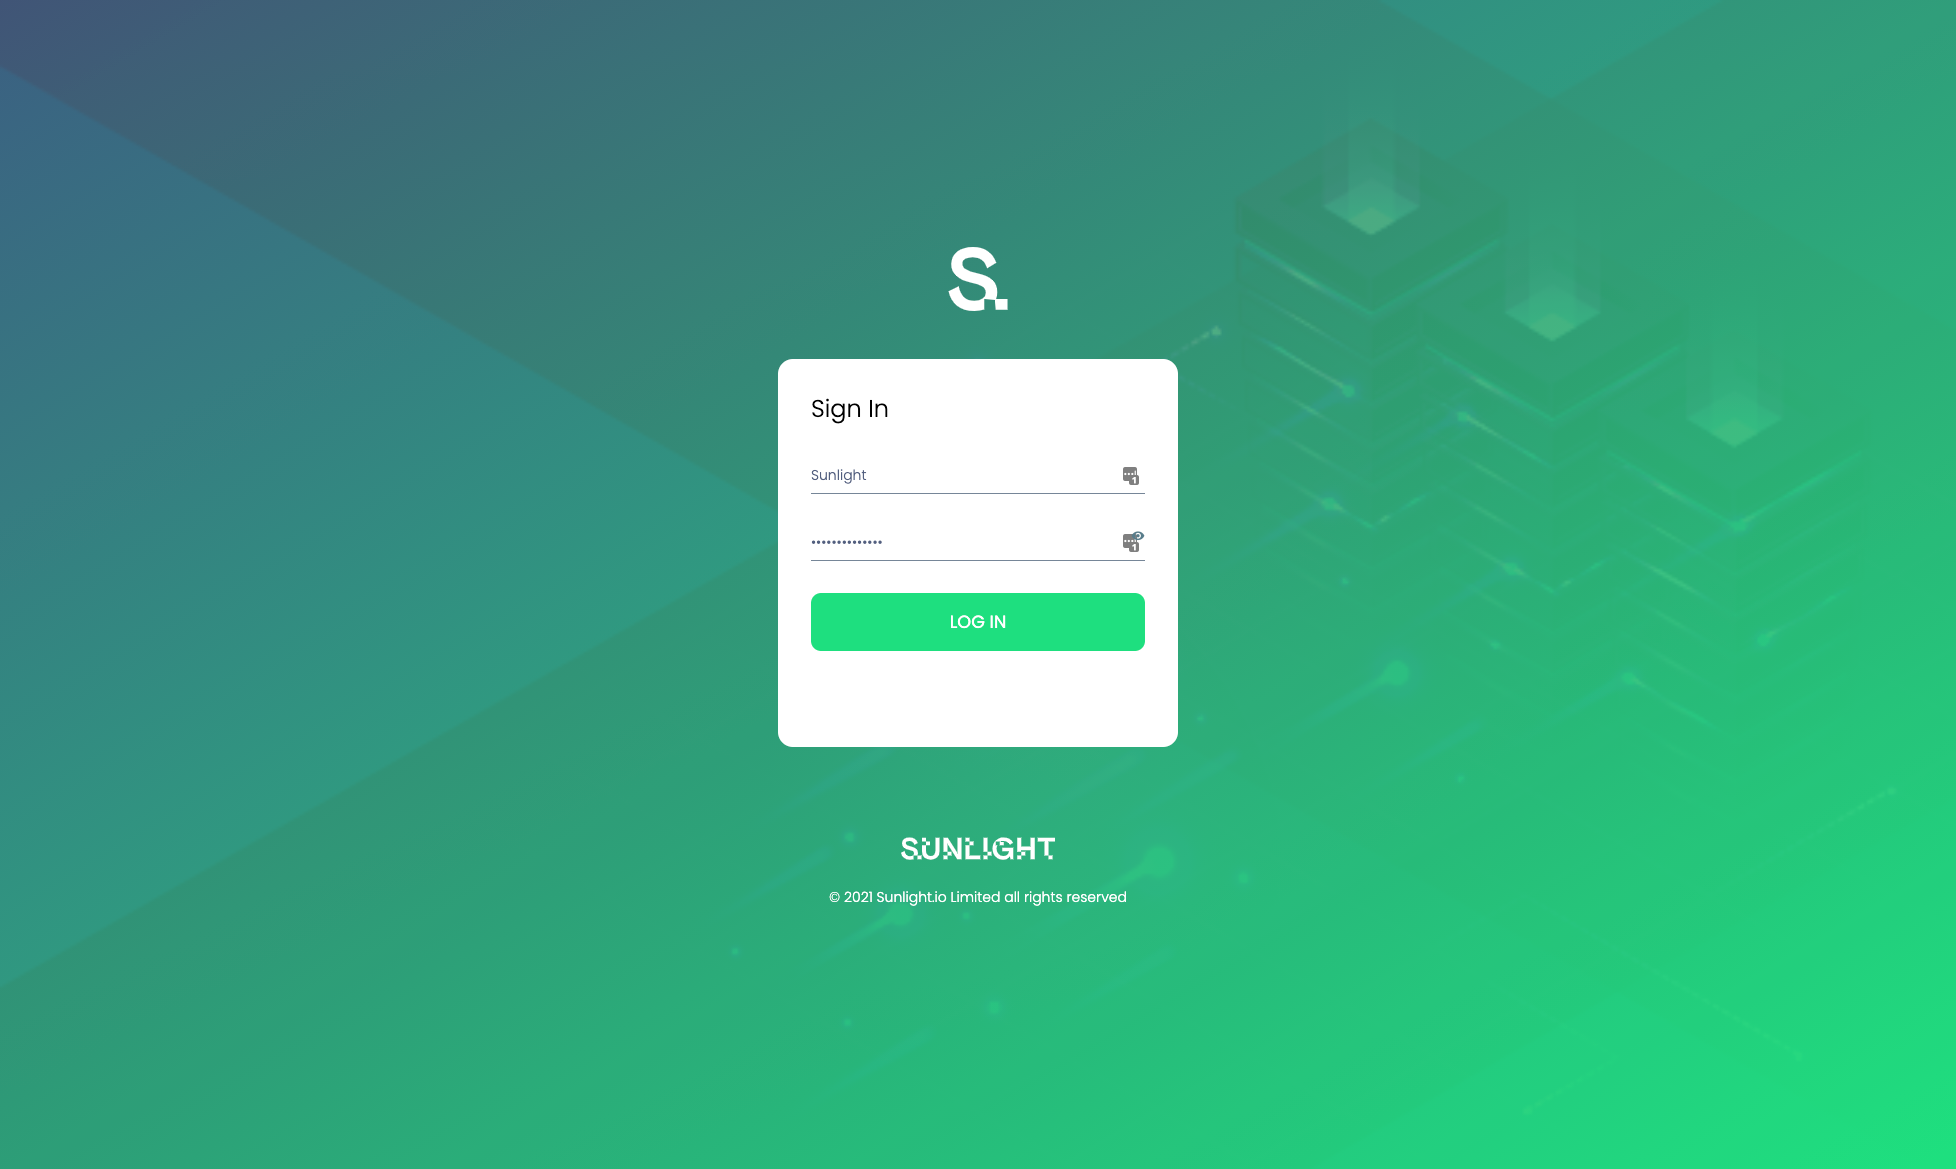
Enter the default username sunlight. The password for your first time login is the AWS assigned instance ID you noted in the previous step from the AWS console.
The system immediately redirects the user to change the password on the first login:
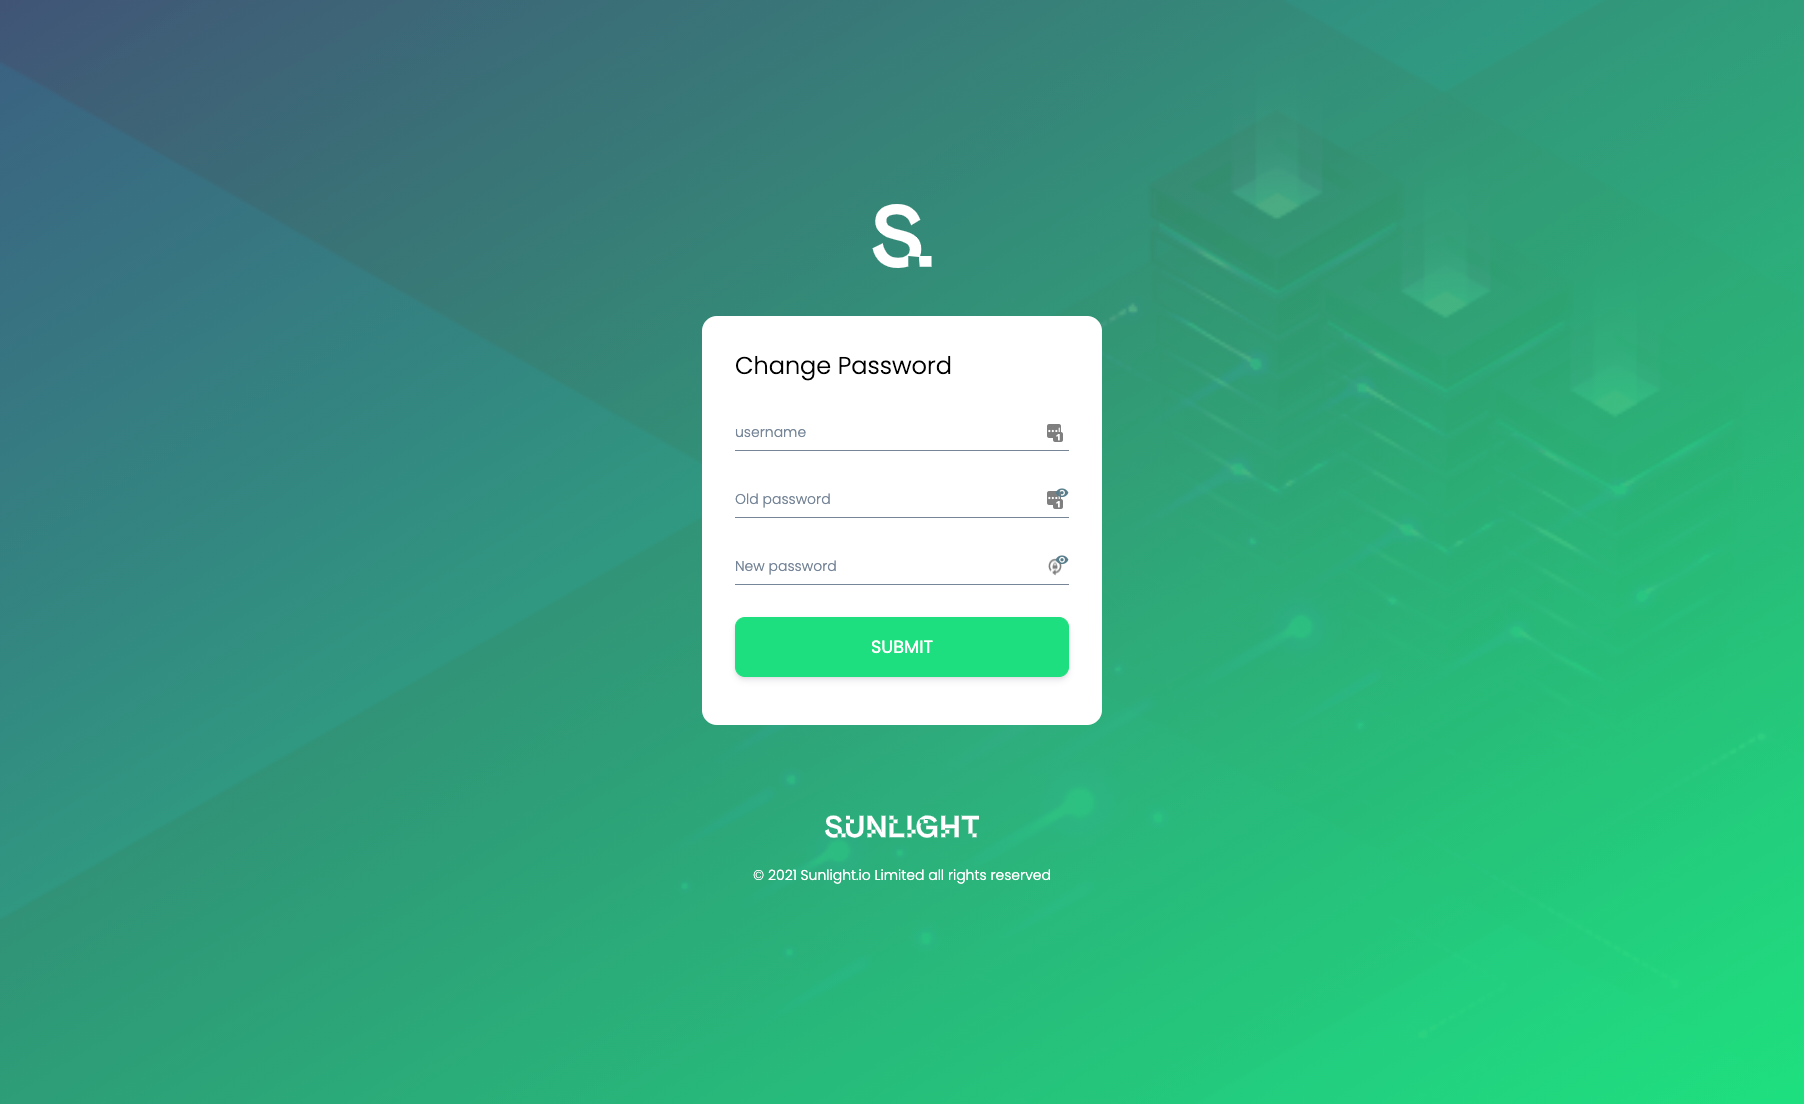
Following a successful password change, the system redirects the user to login again.
With a changed password, you should now be able to login and view the main dashboard.
At this point there are two types of Sunlight infrastructure clusters that you can now manage via the SIM :
(1.) Connect your on-premise Sunlight clusters, in order to access and manage them from the SIM over a secure tunnel.
How to connect the SIM with an on-premise cluster
(2.) Deploying and managing Sunlight clusters on-demand in AWS.
Note
You must configure the SIM to have an execution provider. Please see the Optional post-install step #5 below.
Sunlight Platform Deployment
Now you are ready to start deploying and managing Sunlight hypervisor resources. Please review individual user guides through the following link, for information on how to achieve this in each environment:
How to create an AWS cluster with SIM
Note
The Sunlight support team is always available to assist with any installation and configuration issues you may encounter. Link : support portal
Optional post-install steps
Following are some optional post install steps that are recommended by Sunlight in order to
- secure your SIM dashboard with an SSL certificate and allow https secure connections to the dashboard.
- configure providers functionality for storing all the available templates, allow the creation of AWS clusters and getting backups of the SIM’s internal database.
STEP 1 - Assign an elastic IP to the SIM
In order to assign an SSL certificate it is necessary to have a DNS name and a static IP address configured for your SIM instance. AWS assigns a static IP address by default, but having the same IP address after a reboot in not guaranteed, so this is not sufficient for the purposes of generating a permanent SSL certificate.
To generate an SSL certificate you must create a domain/subdomain entry via your DNS service. If you are unfamiliar with DNS record assignment, please contact the Sunlight support team for assistance.
It is suggested that you wait for full DNS propagation before attempting to run step 2, to avoid SSL issue problems, otherwise you can continue using the IP address assigned.
STEP 2 - Assign the new domain name and generate an SSL certificate
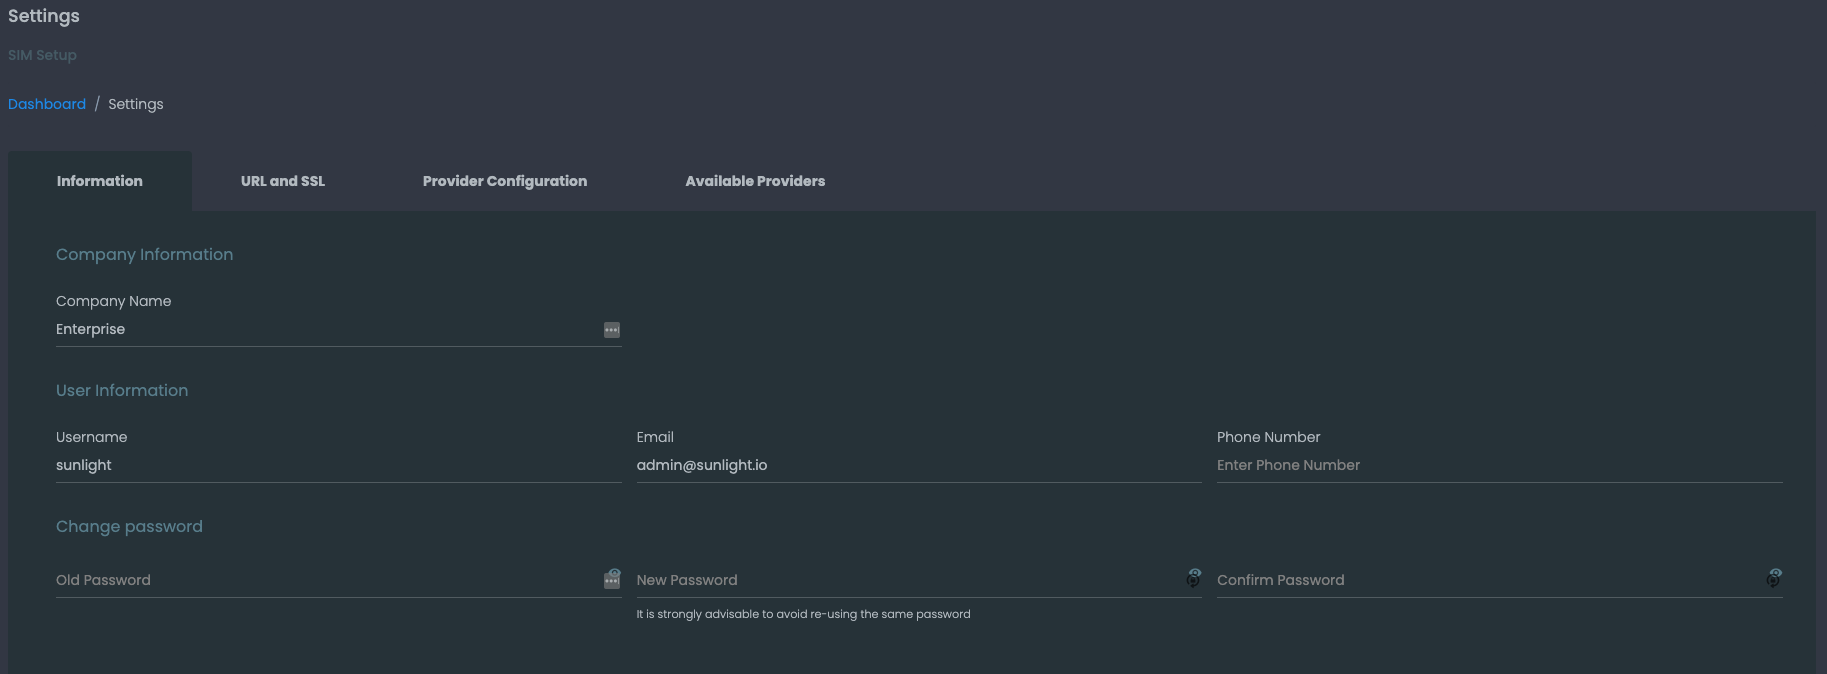
In this step you can proceed to 'Settings' in the SIM UI in order to input the domain/subdomain assigned to the elastic IP and configure the manager to respond under https to that domain/subdomain url request.
By clicking on 'Settings' you should be able to view the following screen:
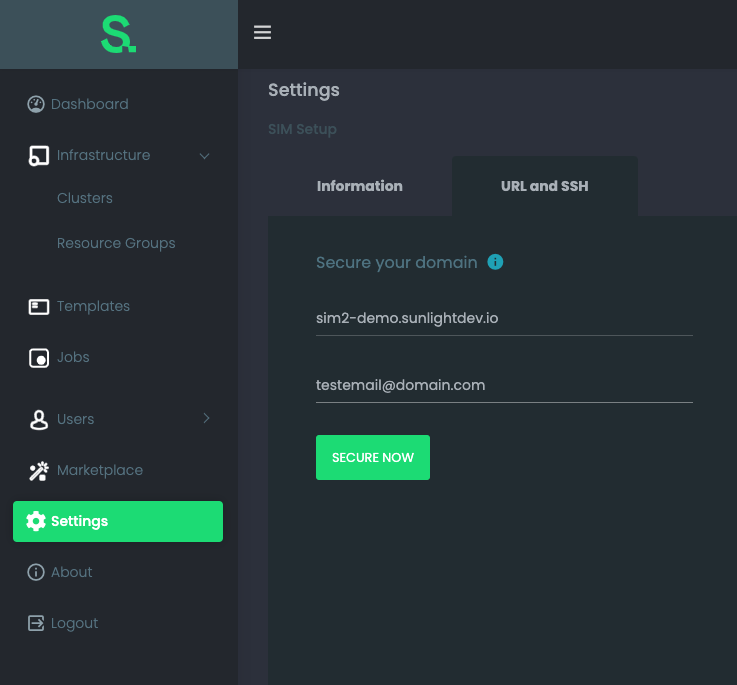
The important configuration step here is to insert the domain/subdomain selected in step 1, as well as a verification email, in order for the proper SSL to be issued.
If this step concludes successfully then your web browser URL will be changed to the one that has just been secured and the Sunlight Infrastructure Manager will be available under a https connection.
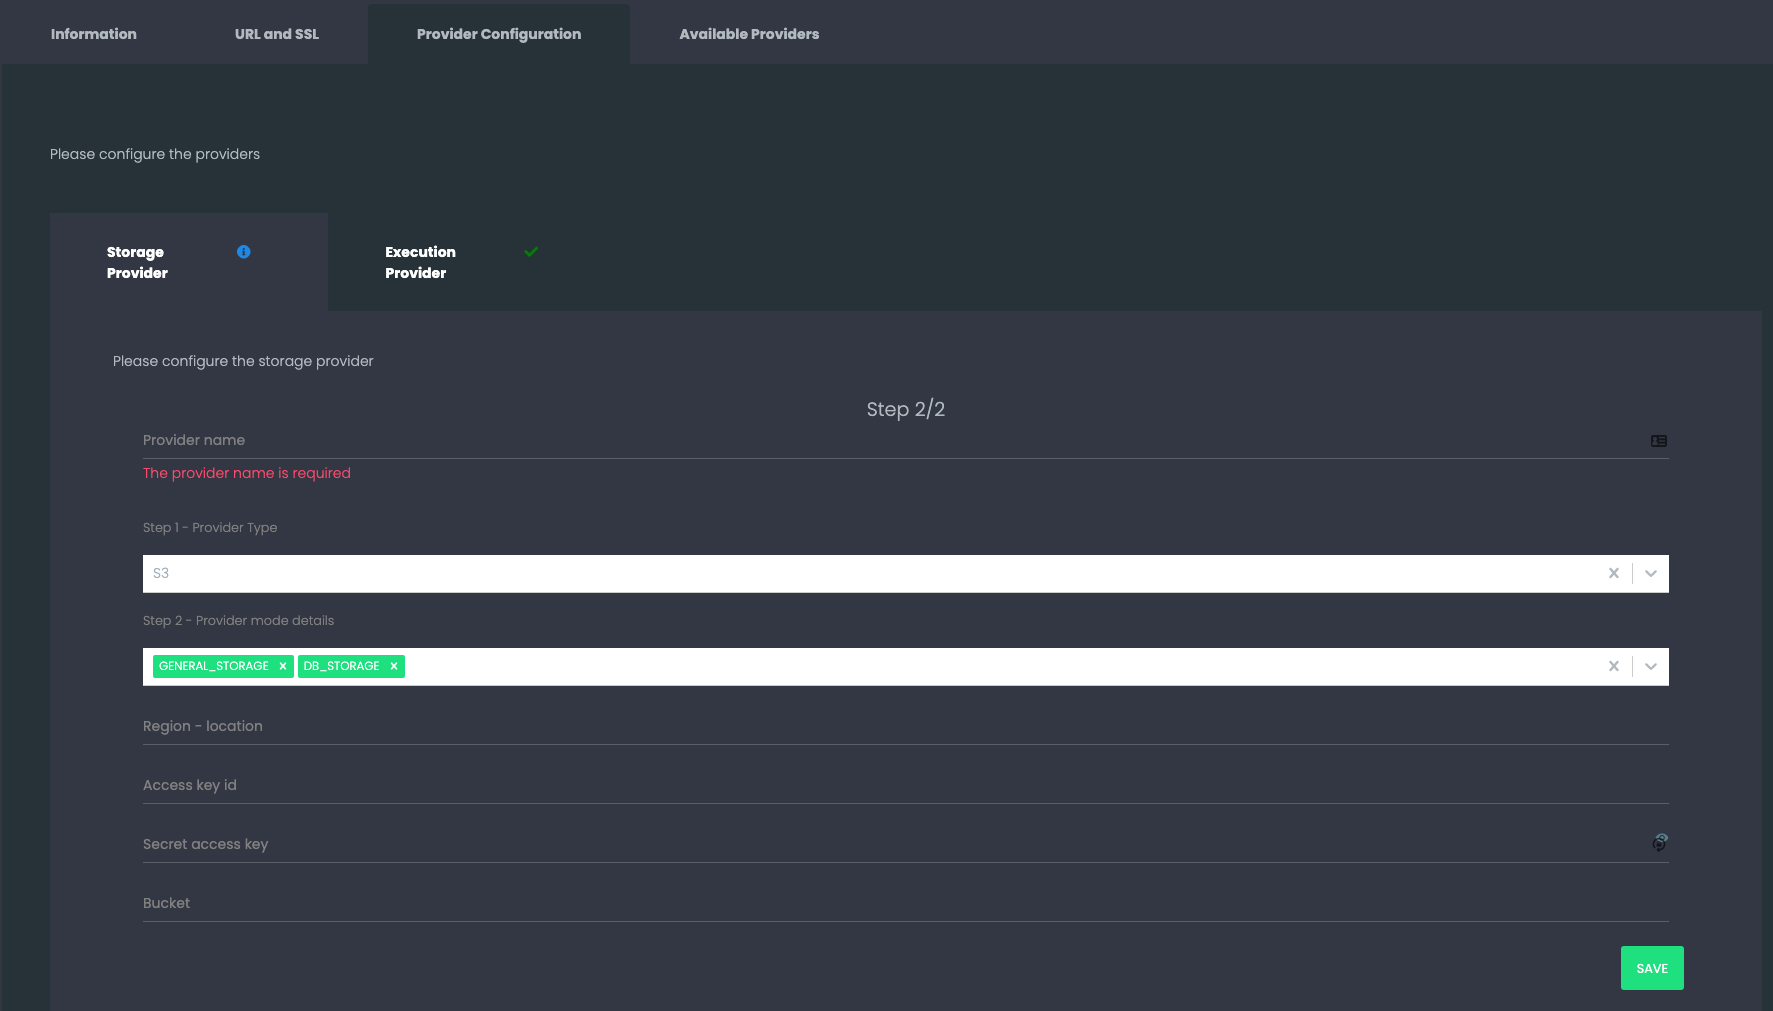
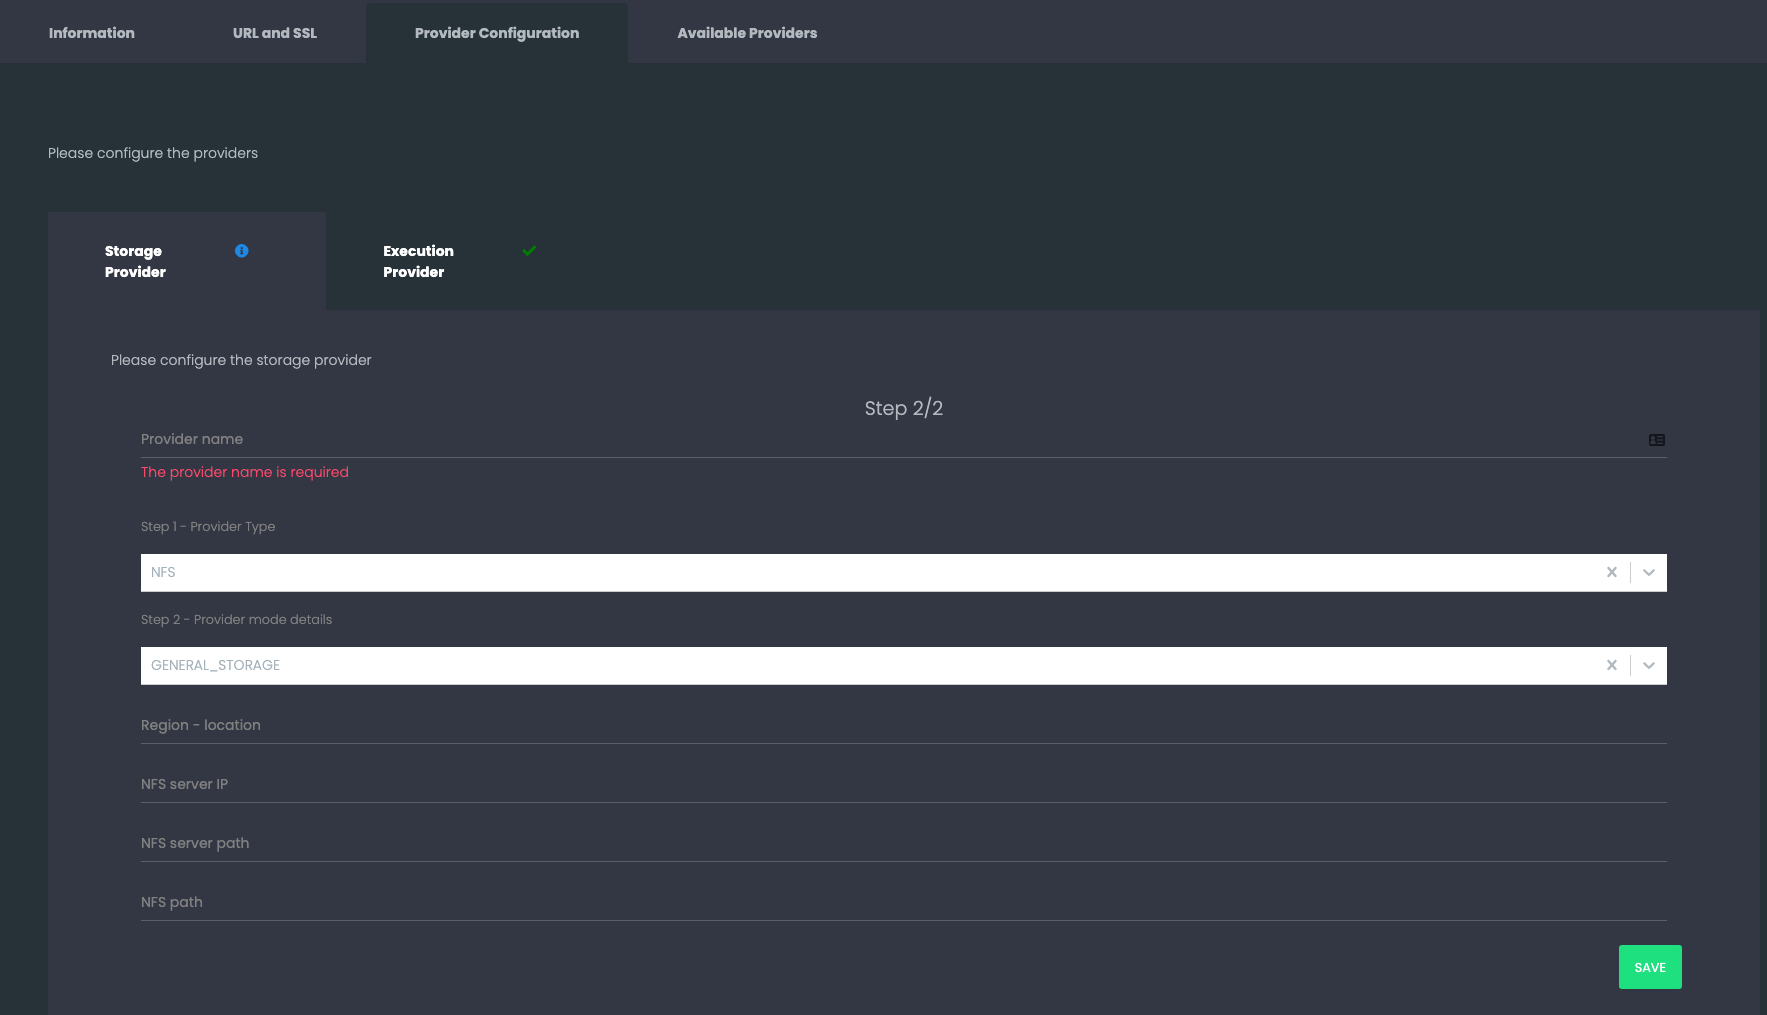
STEP 3 - Create a General storage provider
A general storage provider is a storage end point where clusters can store all the available templates (image backups) from each Cluster. Along each template a metadata .json file is stored which is used to share available templates’ information among all connected clusters to the same general storage provider. Supported types of general storage providers are NFS and AWS S3.
NFS General Storage Provider
A NFS general storage provider requires the following details to be used: The IP of the NFS (e.g. 192.168.1.200) The mount point of the NFS (e.g. /nfs) An optional path to use within the NFS (e.g. / or /templates)
The NFS should be accessible through all of the connected clusters.
Note
For better performance, it is suggested that the NFS server and the clusters to be connected to reside on the same local network. It is not advisable to use NFS mount points over WAN.
S3 General Storage Provider
An AWS S3 bucket can be used as a general storage provider. The required information to setup a S3 general storage provider are:
- The Access key id
- Secret access key
- Bucket
- Region
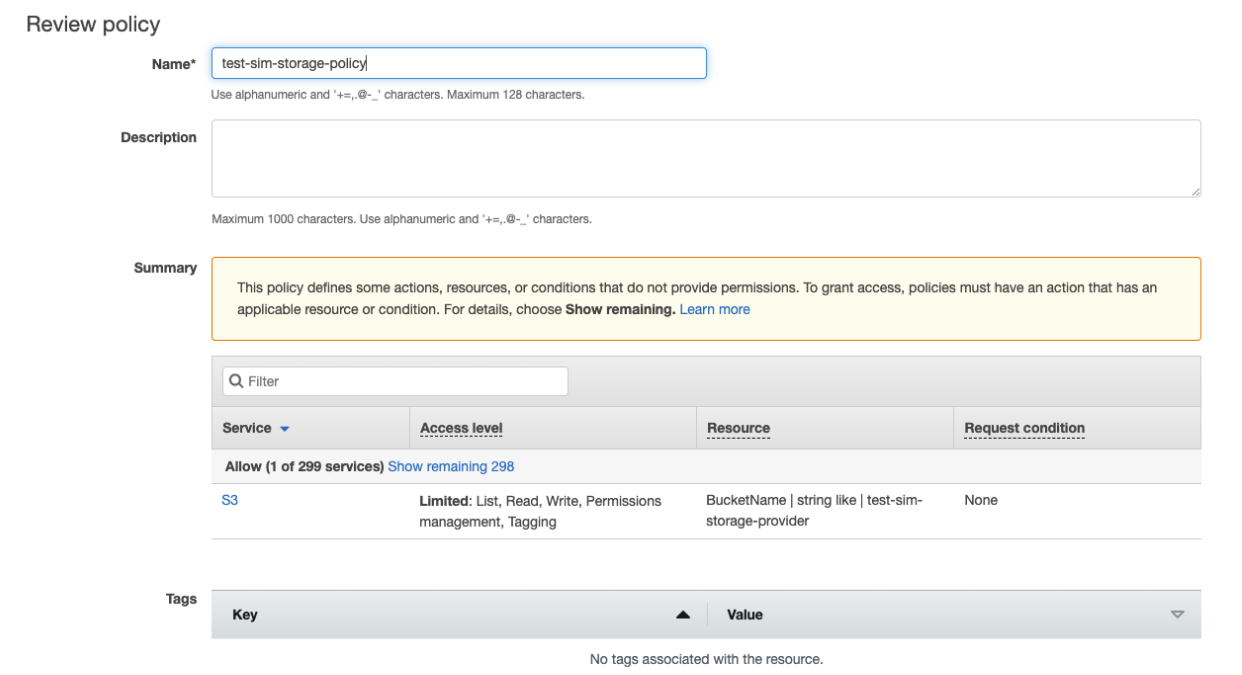
In order to create the bucket and the credential you have to have an AWS active account. First of all a bucket has to be created through the AWS S3 console.
The following images show the option required:

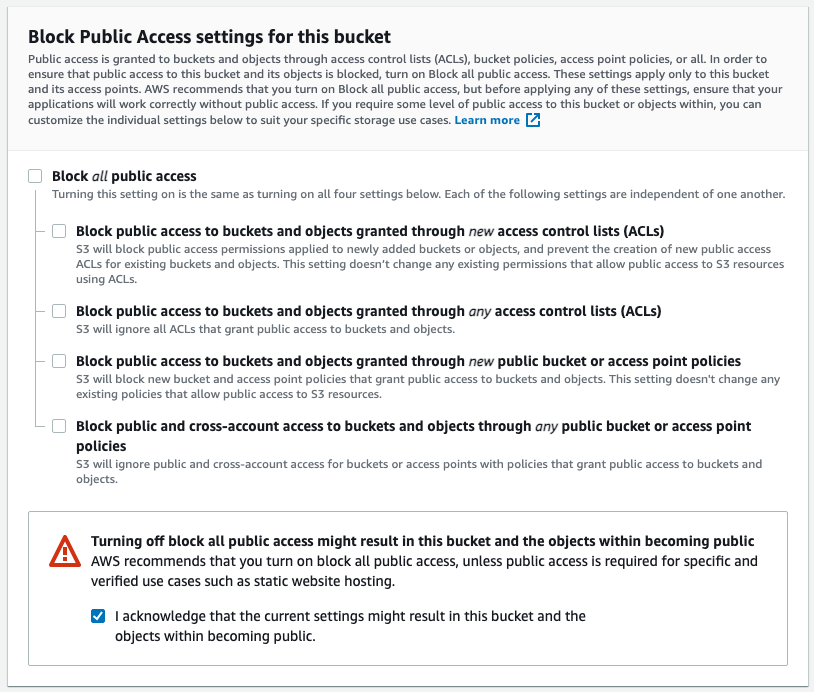
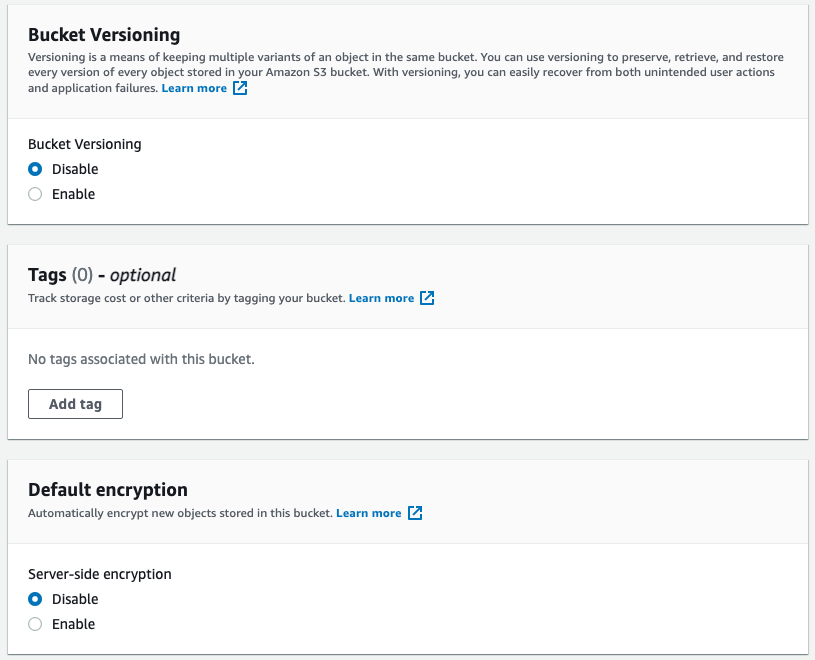
Apart from the name of the bucket the selected region will be required when creating the provider (e.g. us-east-1 or eu-central-1). Then please uncheck in the block all public access checkbox as well as the checkboxes inside this. All other default settings are fine (no versioning, no encryption).
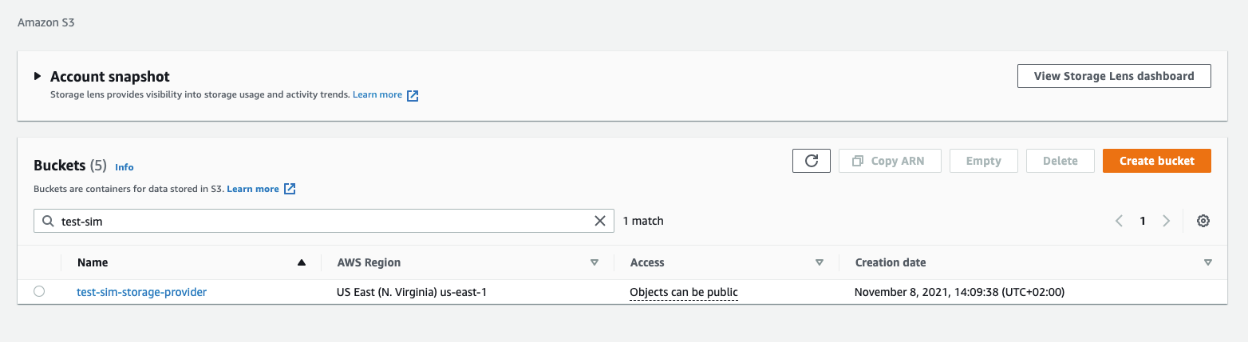
You should be able to have:
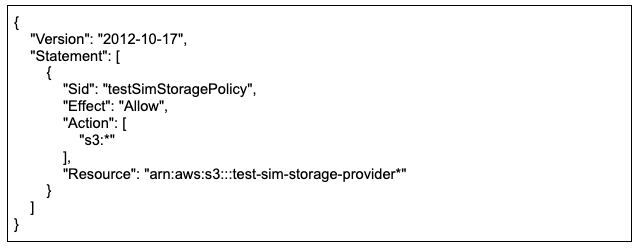
Then you have to create the access credentials with policies and groups. First of all you have to create a policy from the aws iam console:
Add a custom policy through JSON providing the following
Note
Please provide your own bucket’s name, in the required resource placeholder.
Next navigate to the IAM panel and choose to create a new user.
Provide a user name and then select the checkbox “Access key - Programmatic access”.
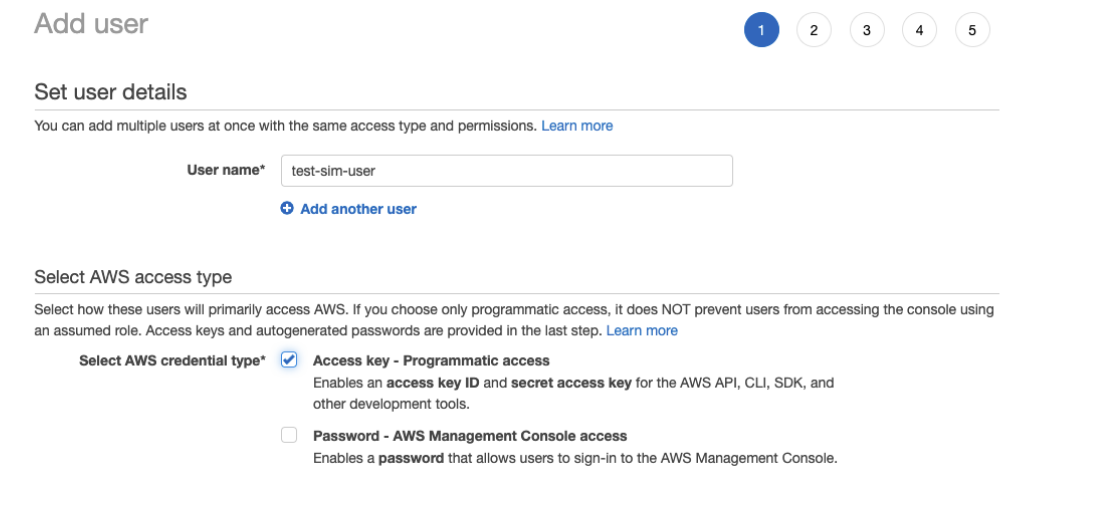
On the next step select the policy that we previously created.
At the last step copy and store in a safe place the access key id and the secret key.
These alongside the bucket’s name and the region are required to create the S3 General storage provider.
STEP 4 - Create a DB storage provider
A DB storage provider is used to periodically save a backup of the SIM’s internal database. The backup is stored locally and if a DB storage provider is present it is uploaded to the bucket as well. The available types of DB storage providers are AWS S3.
The process for creating an AWS S3 bucket with appropriate credentials is the same as the general storage provider’s process.
The folder that is used for templated storage and DB backups are different so there will be no conflict there.
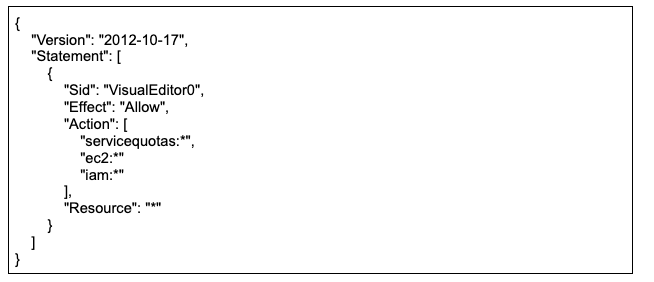
STEP 5 - Create an Execution provider
An execution provider at SIM is required in order to allow creation of new custers hosted in AWS.
First of all you have to create a new policy from aws iam console. The policy should have the following setup:
Then create a new user and attach this new policy.
The user should have “Access key - Programmatic access” selected.
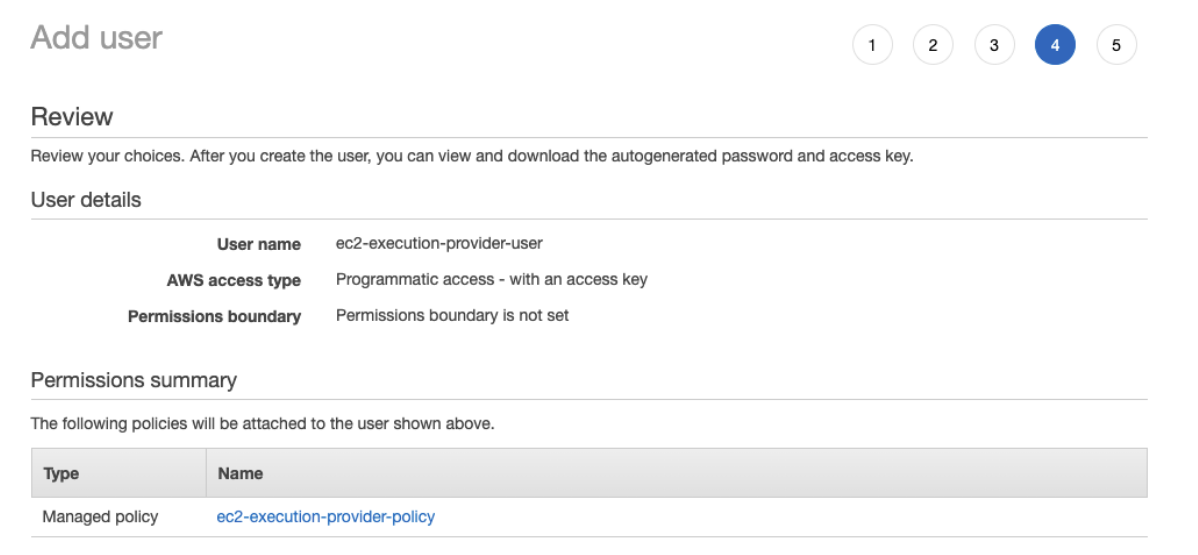
At the last step you have to keep the access key id and the secret key in a safe place. These are the credentials that are required during the configuration of an execution provider at the SIM.
STEP 6 - Assign a provider to the SIM
Having completed the optional steps 3 to 5, you are now ready to configure the SIM, and use any of the above providers.
Please navigate to Settings:
You can create a Storage provider of type S3 for the modes of General storage and/or DB storage.
or create a Storage provider of type NFS for the single mode of General storage.
Following that, you can attach a storage provider to a cluster clicking on the 'Attach storage provider' action from a cluster's action menu
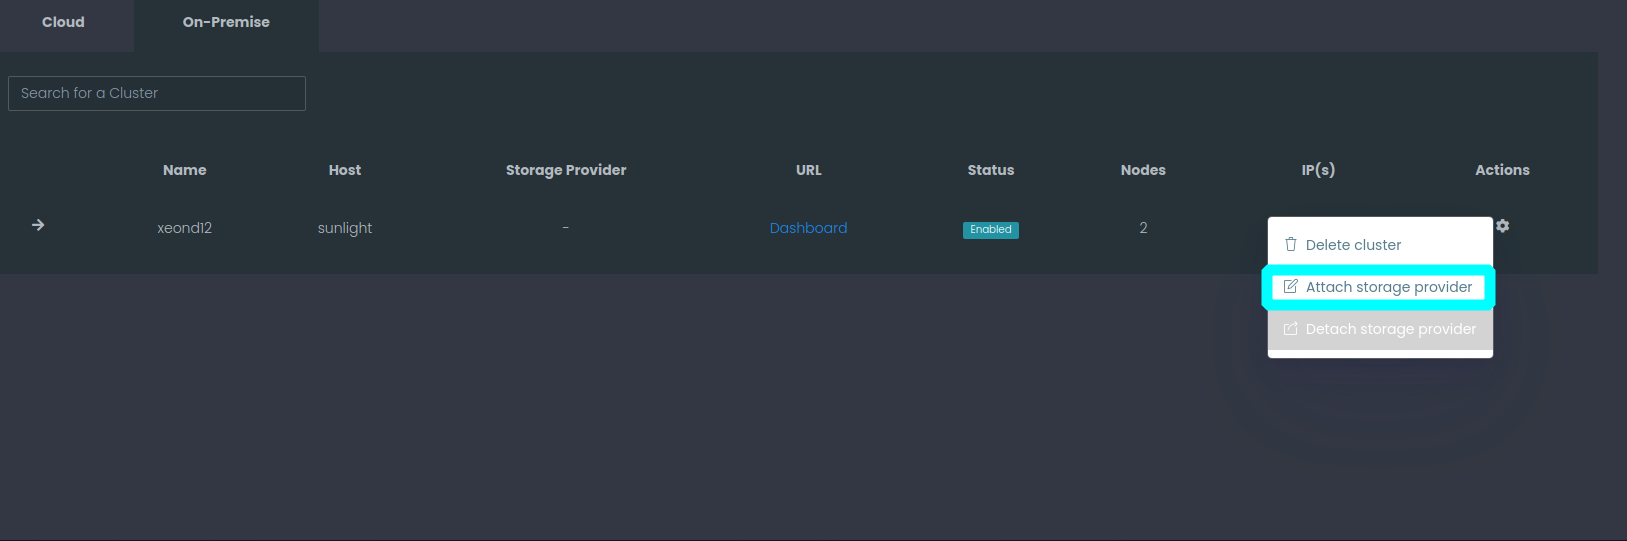
and select the storage provider from the modal that will display

If the cluster has already a storage provider, the detach action will be activated
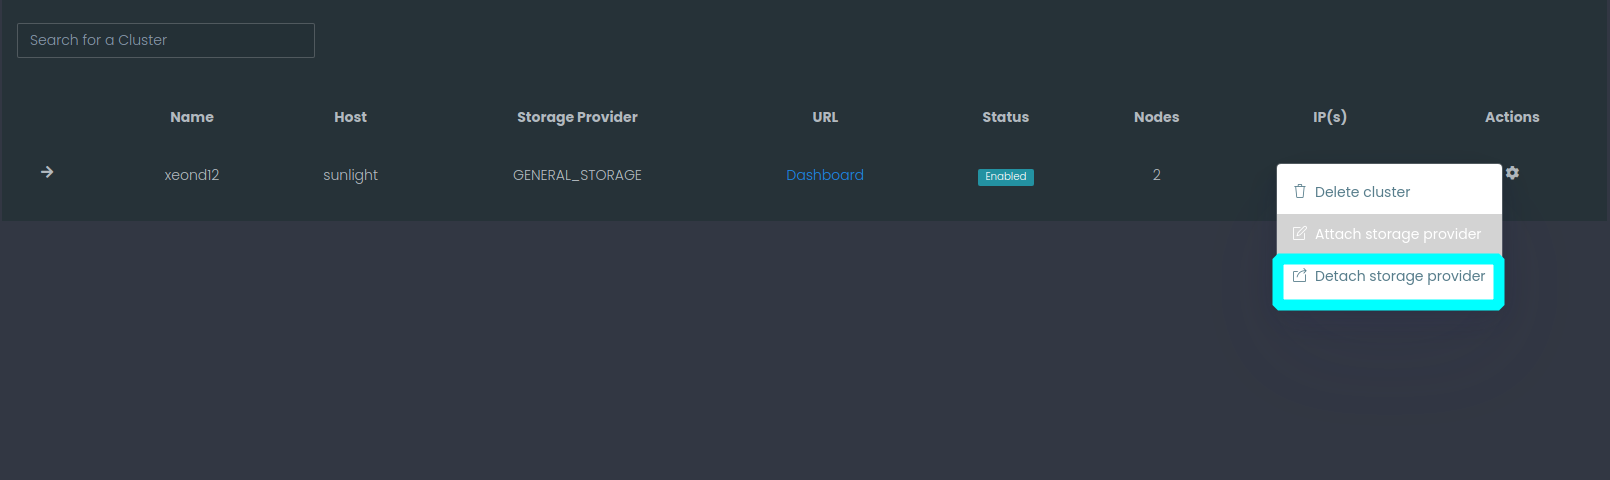
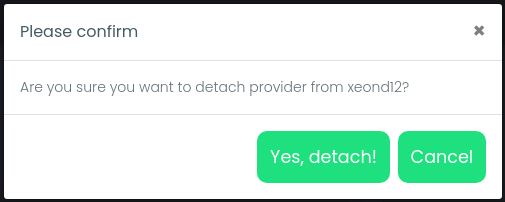
and you can detach the storage provider through the confirmation modal
Additionaly you can create an execution AWS EC2 provider here:
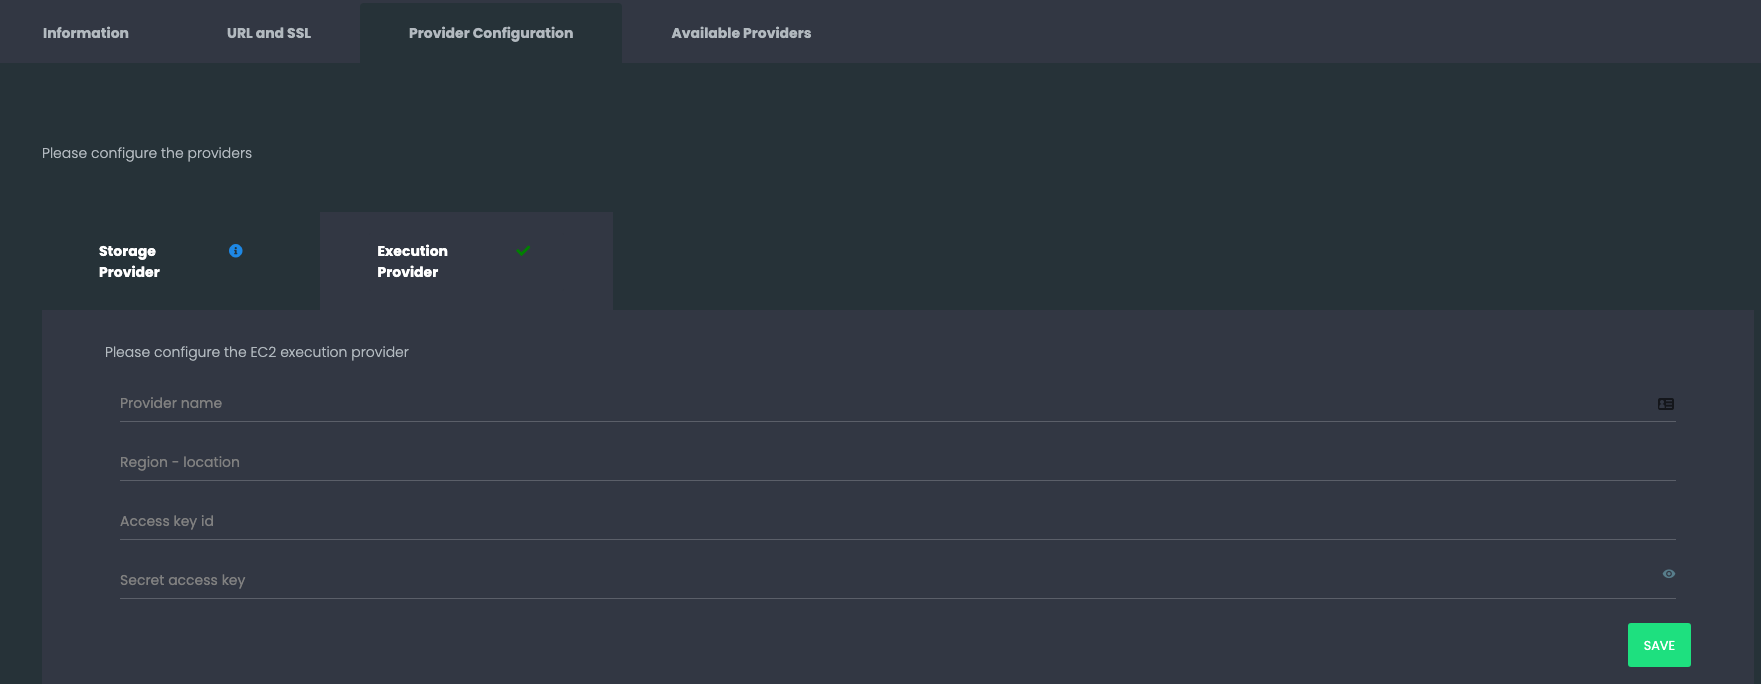
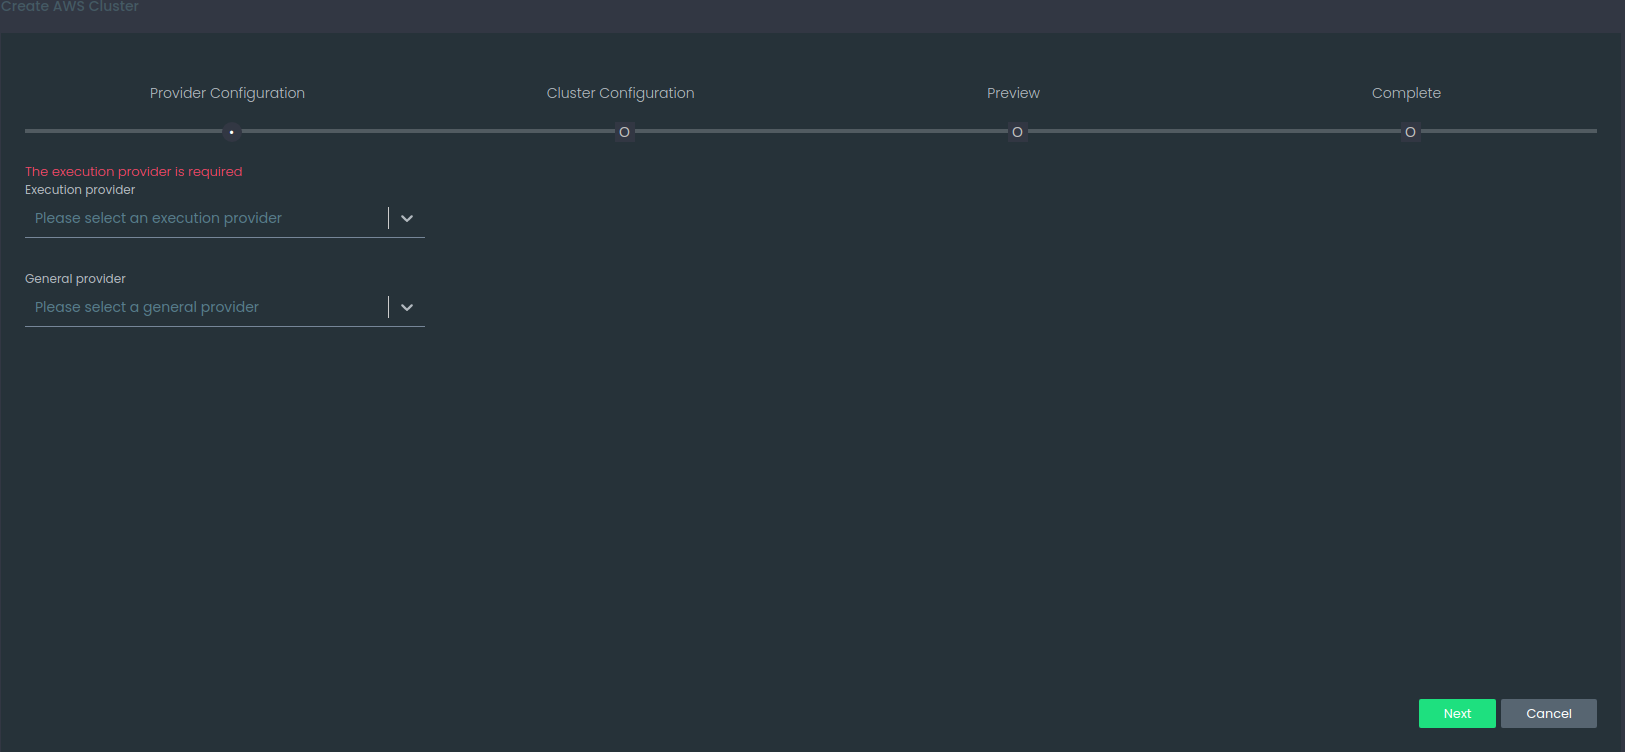
Doing that, you can use the execution provider in the first step of the creation of an AWS cluster
Finally you can view your existing providers here:
